Tag Archives: GM MDI

How to set GM MDI 2 wireless connection?

Firstly offer the procedure on how to set GM MDI 2 wireless connection, then solution to GM MDI 2 software error “Not connected to MDI”.

GM MDI 2 Multiple sotftware

GM MDI 2 wireless connection error

This is the GM MDI 2 hardware I have:

gm-mdi2

Part 1: How to set GM MDI 2 wireless connection:

Watch Youtube first:

What to do if MDI failed to connect on Wireless interface?

Check the wireless card is properly seated in the  WiFi GM MDI.

Confirm LEDs on the wireless card are lighted when the MDI is powered.

Verify the MDI and PC are within range of the Access Point or Router.

Verify that the PC is connected to the Access Point or Router.

Verify signal strength of the wireless network from the PC.

Check Firewall Settings on your PC

USB connection takes precedence, unplug USB cable.

Wired Ethernet connection takes precedence, unplug Ethernet cable.

Connect to MDI using USB and run MDI Manager to verify the Wireless Settings are

configured correctly.

o Wireless interface is enabled.

o AP settings configured for proper security (authentication, encryption).

o Signal Quality (fair, good, excellent) indicates connected to AP.

o The MDI, PC and AP are on the same subnet

o If using static IP, verify the IP Address and Subnet mask are correct (supplied by network

administrator.

Part 2: GM MDI “Not connected to MDI” solution

All what you need do is to refresh the GM MDI firmware.

Details at: http://blog.obdexpress.co.uk/2015/12/08/gm-mdi-meet-not-connected-to-mdi-error-and-solution/

Source: http://www.obdexpress.co.uk/service/how-to-set-gm-mdi-2-wireless-connection.html

How to use GM MDI clone for Chevrolet SPS Programming?

This article is available with the method to use GM MDI scanner the for GM SPS Programming in what is known as J2534 mode for calibration updates. This can be for the ECU or any programmable module in the vehicle, such as the EBCM, TCM, Radio, or IPC that you may want to reflash.

IMPORTANT: Pay very close attention to the instructions around power cabling and battery readiness as a power fluctuation during an SPS programming procedure can permanently damage a controller module.

Applies to the genuine Vetronix, ETAS or Bosch built MDI as well as high quality Chinese clones (sp163-csp163-dsp163-e) equally and for all makes under General Motors such as Chevrolet, Buick, GMC, Cadillac, Oldsmobile, Pontiac, Hummer, Saturn, Opel, Vauxhall, and Saab.. The programming is illustrated using a 2012 Chevrolet Cruze ECO and the http://www.acdelcotds.com subscription service features using a Techline PC using J2534 mode to update the instrument panel controller (IPC).

Applicable to model year 2011 and up, which is when the Tech2 ended and was fully replaced by the GM Multiple Diagnostic Interface tool, or MDI and MDI 2, and TIS 2 Web subscriptions.

Here are GM MDI multiple diagnostic tool high quality clone:  

mdi-for-chevrolet-cruze-sps-programming-01

Procedure for SPS programming on 2012 Chevrolet Cruze ECO:

  1. Login ACDelco for subscription.
  1. Connect GM MDI to the vehicle’s diagnostic port, and get connected through USB to the back of the laptop. It’s taking the power through the vehicle and the vehicle has a battery that’s fully charged and good and strong for this. We got our laptop for awake not gonna to sleep.
  1. Enter into SPS, click on “Start SPS” which is a server-based Java Web.

A few security prompts to go through here and then we can run this.

mdi-for-chevrolet-cruze-sps-programming-2mdi-for-chevrolet-cruze-sps-programming-3mdi-for-chevrolet-cruze-sps-programming-4

  1. Here connect up through the WIFI on the laptop (Wifi may has problem, so I don’t like Wifi).

I gonna actually use MDI tethered to USB.

  1. Now we’re gonna show J2534 MDI. And we are going to reprogram an existing ECU.

mdi-for-chevrolet-cruze-sps-programming-5mdi-for-chevrolet-cruze-sps-programming-6

  1. Ok, it’s talking about making sure everything’s connected properly.
  2. Turn ignition off.
  3. Verify vehicle battery fully charged.
  4. Turn ignition on, engine off.
  5. Connect J2534 device to Data Link Connector.
  6. Connect J2534 device to PC.
  7. Switch J2534 device on and wait for device to get ready.
  8. After programming, the technician will be given the opportunity to clear diagnostic trouble codes of all ECUs on this vehicle. The technician may want to record DTCs and Freeze Frame Data before continuing.

mdi-for-chevrolet-cruze-sps-programming-7

  1. Pick Chevrolet 2012 passenger car and Cruze.

mdi-for-chevrolet-cruze-sps-programming-8

  1. It’s going to do some communication with the vehicle through the GM MDI.

We see we gave connected the vehicle. You can catch it momentarily.

mdi-for-chevrolet-cruze-sps-programming-8

  1. Go to next screen. This is the list of our controllers that we could potentially do a calibration update.

mdi-for-chevrolet-cruze-sps-programming-10

  1. This particular vehicle everything is updated already except for the instrument cluster.

So that’s what I’m going to be showing you, so I’m gonna select “Programming“. Because it’s already configured and setup and we’re gonna be doing normal.

mdi-for-chevrolet-cruze-sps-programming-11mdi-for-chevrolet-cruze-sps-programming-12

  1. With the next screen here we see at this point you know we have communication with the computer and communication with the vehicle.

That’s confirmed by what we see on the screen connecting to the server. Communicating to the device.

mdi-for-chevrolet-cruze-sps-programming-13mdi-for-chevrolet-cruze-sps-programming-14mdi-for-chevrolet-cruze-sps-programming-15

  1. On this screen, we can see the operating system for the edged instrument panel.

mdi-for-chevrolet-cruze-sps-programming-16

  1. Current calibration is 95903188, which is the very original one and we can see there’s two sense manufacturing in the vehicle (562 and 922).

552 doesn’t really have any information, it just says a stop ring system, but 922 says they were that update for the trip timer.

So we are going to go ahead and take this update (trip timer update)

Click “Yes” to confirm to update.

mdi-for-chevrolet-cruze-sps-programming-17mdi-for-chevrolet-cruze-sps-programming-18mdi-for-chevrolet-cruze-sps-programming-19

  1. In some cases, there might be some other modules that get updated as well.

But in this particular case it looks like everything else stays the same it’s just our operating system updates, that’s great.

  1. Now before I started this since I’m updating the instrument panel. I did take a note of the vehicles mileage and vehicles current trip meter setting and other things like that, just in case I get asked to enter that sometimes with other vehicles. I have been asked that I don’t know if I will this time or not.

mdi-for-chevrolet-cruze-sps-programming-20.

  1. All right, we are downloading the information onto the laptop. Looks like that has completed so now we’re gonna start doing the last piece which is moving it from the laptop over to the instrument control, the instrument cluster controller.

We can see we are communicating with the PC and vehicle.

and we are communicating with the sever and we’re slowly doing download from the laptop through the MDI to the vehicle controllers.

Looks like we got some status over here about two megabytes of information.

So this is gonna take a little bit. Guys we’re down to the last minute here. We can see over here on the MDI we’re still chugging away I din’t want to you see. Very briefly on the instrument cluster itself while this is going on so it’s nothing to freak out about. It’ll completely blanked out except for the check engine light over.

And the radio will also be blanked out during this programming.

So that’s just normal, because we are updating the cluster.

mdi-for-chevrolet-cruze-sps-programming-21mdi-for-chevrolet-cruze-sps-programming-mdi-for-chevrolet-cruze-sps-programming-23mdi-for-chevrolet-cruze-sps-programming-24

  1. You can see our instrument cluster as rebooted and I see my mileage is still there, so that’s good.

That was the case normally when you replace instrument panel cluster you’ve got a re and put the mileage. But I was hoping that just an in-place update wouldn’t ask for that.

And so we see back over here, we go no activity on the MDI at this point and then over here we got final closing screen you know success we have this action complete that we’ve done this programming on the instrument panel cluster.

And we’re looking down here to see if there’s any special instructions, and again we have here is just the generic information about clearing DTC’s.

We’re done.

mdi-for-chevrolet-cruze-sps-programming-25mdi-for-chevrolet-cruze-sps-programming-26mdi-for-chevrolet-cruze-sps-programming-27

That’s all.

Thanks

Source:http://www.obdexpress.co.uk/service/how-to-use-gm-mdi-for-chevrolet-sps-programming.html

GM 2018 2019 Diagnostic Tool Programmer Tool Buying guide

Topic: For GM 2018 2019 Diagnostic Programming,VXDIAG VCX NANO GM or GM Tech2  or GM MDI?

One comparison table among VXDIAG VCX NANO GM, GM Tech2 & GM MDI:

Item VXDIAG VCX NANO for GM/Opel GM MDI WIFI GM Tech II scanner
Image vxdiag nano gm gm mdi gm techii
Software GDS2 (2014) /Tech2Win GDS 2 (2011)Tech2 Win TIS2000/SPS
Need computer Yes, it’s PC-based. Yes, it’s PC-based. TIS2000 on WinXP
System

requirement

Win7 32/64bit /Win8 64bit system Package software: Win XP only


v2016.11 software: Win 7

Win XP for TIS2000
Multi-Language Multi-Language Multi-Language Multi-Language(depends on vehicles)
WIFI YES, VXDIAG GM has wifi version and USB version WIFI and USB connection NO
Diagnosis wireless basic diagnostic wireless basic diagnostic basic diagnosis
Programming GM TIS2WEB online Service Programming System (SPS) wireless online programming


offline programming ,such as European Chevrolet, Opel, but not for all cars

Online programming with TIS2000 on Saab/Opel (-2008)
Update Firmware updatable

Software updatable

Firmware update Update via 32MB Card
Activation No need to activate Yes, MDI need activation. No need to activate
Supported protocols CAN, UART, KW2000, Class2, GM LAN, etc. UART, Class 2, KWP2000 and GMLAN (CAN) CANdi interface
Supported vehicles Vehicles to 2015 GM,

OPEL

vehicles from 1990-2014 GM,

Opel,

Chevrolet,

Saab,

Australia Holden (2010-2012)

vehicles from 1992-2013 GM,

SAAB,

OPEL,

UZUKI,

ISUZU,

Holden

Advantage -cheap but with the same function as GM MDI


– WIFI and USB connection

-good for new cars

-can support software from original factory

-support offline & online programming

-cannot plug original software card, but can support original program


-easy to carry on

As you can see, GM MDI is the best GM 2009 – 2019 diagnostic and programming tool.

It is cheap (238eur with software and free delivery).

It is programming online, support offline programming for Opel Chevrolet.

If you want to program by using GM MDI, you need to buy account at GM MDI official site:

https://www.acdelcotds.com/acdelco/action/subscribehome

GM MDI Compatibility:

Device is compatible with GDS2 (Opel)

Device is compatible with Tech2Win (Opel, Hammer)

Device is not compatible with SAAB via Tech2Win

GM MDI Cars test reports yes and no:

1: SAAB 9-5, 2003, 3.0 TID– Yes

mine is clone from China.

MDI Software 8.1.135.13

GT32

SAAB NAO V9.250

Simply pressed OK when Candy detected and all worked.

Tested on SAAB 9-5, 2003, 3.0 TID

2: 2014 model – Yes

SAAB NAO V9.250 is from 2014. Already tested.

2003 year too old – not interesting for me.

3: Saab 9-5, 2003, 3.0 – Yes

Tested by my own, works with Saab 9-5, 2003, 3.0

1: online – good, offline – bad

GM MDI good, interface works online.

update mdi 100%.

offline too bad for new cars.

2: wifi card compatible

So far, Chinese clone GM MDI with squ wifi card

3: wifi is not working but works fine with USB

I bought a cheap one and it only worked with usb. The wired network and wifi did not work. In fact, the card flash socket was missing from the board. Build quality was not to bad. I just use it to flash newer pcm/ecm’s.

GM MDI WIFI version:

http://www.obdexpress.co.uk/wholesale/gm-tech2-gm-diagnostic-scanner-obd2express.html

GM MDI USB version:

http://www.obdexpress.co.uk/wholesale/gm-mdi-multiple-diagnostic-interface-with-usb-connection.html

Part 2: Why GM MDI instead of Tech II scanner?

Flash faster: MDI & GDS2

As for why GM is going to the GM MDI and GDS2, instead of using a Tech II with TIS2000 software, because the MDI with GDS2 flashes a hell of lot faster when you have flash a new module with either it orginal firmware or upgraded firmware. Its also faster to use than having to press buttons on the Tech II for basic commands during diagnostics as well.

Older cars: Tech II & TIS2000

So in regards to the vets, Tech II clone will cover all the C6 cars and older since the last of the updated firmware on the unit covers from here back. If you do need to reflash something, it’s done via Tis2000 with the Tech II as the pass through device.

New & old cars: MDI interface

Since GM did not make upgraded firmware to flash into the Tech II’s to cover these cars like C7, then it’s a MDI that is needed instead. As for the MDI’s firmware, they will cover not only the new cars, but the cars that the old Tech II’s used to cover as well.

Now the glitch on the MDI regarding cloning it, since it has to use the GDS2 software for the pass through only device, GDS2 software has not been cracked like Tis2000 software has been instead.

GM account for subscription: MDI need it

So the only way that even a clone MDI is going to work, is to have a subscription to GM (Few $K a year) to allow you to use the GDS2 software that has to log into GM each time it used instead.

Hence the Clone Tech II unit you get will already be loaded with the most current firmware, and for most of the stuff you going to use the Tech II clone, will just be using the unit by itself without being connected to a laptop.

Also the cracked copy of Tis2000 that you get with the clone model, does not have to be connected/logged into GM to use it for 99% of the stuff (do not need an account with GM).

Note, if push comes to shove and you can not find a copy of the needed firmware to flash into a unit to upgrade a module, then you can get a one day subscription to GM to pull down the needed file from them.

Part 3: GM MDI alternative: VXDIAG VCX NANO GM device

Confirmed: VXDIAG VCX NANO GM device works as a clone to the GM MDI.

since it also comes with GDS2 as well to work on newer cars.

I ordered and received a VXDiag VCX Nano on Saturday. I currently have a Tech 2 clone unit.

I primarily bought it for the later cars which use GDS2/MDI, specifically a Chevy Cruze and a ’15 C7. I also bought a refurbished HP Elitebook running Windows 7 Pro 64-bit on a dual core I5 processor.

The software CD that comes with the VCX Nano I received has two install routines with installation instructions that were brief and somewhat minimal. One install routine for Tech2Win and one for GDS2. The Tech2Win software installs and runs under native Win 7, and with not too much trouble that was up and running, and I could use it on an ’01 Vette.

Install the VM player as admin (right click on it and select run as admin).

Once have vm player installed on your machine, forget all about the VM player app start icon, since you not going to use it, since the xp version it has set up under it, will not work with nothing else but GDS2.

Now copy the GDS2 folder from the disc, to somewhere on your drive (folder and the files in it).

Now in that GDS2 folder you just copied to your hard drive, your going to right click on the VM.vmx file inside that folder and select to open it with Vm player app (selected from programs from the list).

If you want a icon to click on to open the GDS2 program via VM player without having to go into the folder each time, do a copy on the VM.vmx file via the right click method, go over to your desk top, do a right click paste of it there to make a short cut, do another click on the shortcut icon you just pasted into desk top, go down to rename, and just change the shortcut name to GSD2. Now when you click on the new icon named GSD2 you just made, it will open up GDS2 in the vm player.

If you want the icon in the start drop down menu, then right click on it again, and select pin to start menu (classic in my case, since I run classic shell since windows 8).

Hence you don’t start the GDS2 program by clicking on VM player, but by clicking on the vm.vmx file in the program, with it desinated to be opened up via VM player instead. Note if you do the GDS2 shortcut icon, make sure that is selected to open up with VM player as well.

Cons:

Someone think it sounds like the Nano is not an option for us novice users, Seems like a very difficult process.

Sum:GM MDI and VXDIAG VCX NANO for GM is the top choice for GM Opel Saab up to 2018 2019 diagnostic and programming. GM Tech2 clone for GM up to 2009 year.

Source:http://www.obdexpress.co.uk/service/gm-up-to-2018-2019-diagnostic-and-programming-tool-advice.html

How-to’s of VXDIAG VCX NANO GM + TIS2000 works?

Topic: How to use VXDIAG VCX NANO GM work with TIS2000

ok for anyone trying to use the VXDIAG GM nano with SPS this is what you need to do (order is important):

*** please note you cannot use the VM that the VXDIAG package comes with (GDS2 VM). It’s configured in such a way it won’t work with the dongle crack and caused me a lot of head scratching to find this out.

1. Create a windows XP 32bit VM using VMWare Player

2. Make sure you add an LPT port (set to auto, not connected on startup). It doesn’t matter if your actual PC has an LPT port or not this is needed for the dongle crack later.

3. Install VMWare tools for your VM

  1. After you have the windows VM up and running install the BOSH MDI drivers here:

(the MDI drivers on the driver disk and vxmanager installer wouldn’t install on my xp 32bit VM but the one from bosh does)

5.From the driver disk or from allscanner.com install the VXDIAG MDI package with pass thru driver (VXDIAG MDI manager or VXDIAG Manager)

Download tis_data_1.iso, tis_data_2.iso, GM-NAO-TIS200-3_2008.iso, TIS2000DongleCrack.rar from this: http://auto-professionals.co/?dl=5847273d53a0b0635724a7b3e1626ef7  (password: mhhauto) or you can purchase one TIS2000 crack

  1. (files / instructions in the updated.txt you may need to click the link more than once if you get an error when downloading)
    7. Mount the tis_data_1.iso in your VM (use the virtual cdrom in vmware player and attach to iso file) this will start the auto install of the TIS2000 2007.3 software)
    8. All options can be installed using the default selections however make sure you check the install checkbox above the parallel security device on the one screen.
    9. After installation is complete you can extract the TIS2000DongleCrack.rar and copy the folder to the desktop of your VM
    10. Go into the TIS2000DongleCrack folder locate the drivers folder and open it, run the DDINST32.EXE (if you get a registry error you didn’t install an LPT port in your VM), select Express and it should install the files then click ok / Exit to close.
    11. Go back to the main TIS2000DongleCrack folder and copy SCAControlUI.exe and Id.dll to c:\Program Files\cosids\bin\ (it will prompt to replace id.dll select yes).
    12. Go back to the main TIS2000DongleCrack folder into the Dongle folder and copy the 2 files in there to c:\windows\system32\ (the dongle crack is now installed)
    13. Now mount the tis_data_2.iso in your VM (use the virtual cdrom in vmware player and attach to iso file) and open TIS2000 (double click the icon on your desktop) when TIS opens it will ask you if you want to upgrade click yes.
    14. After the upgrade completes mount the GM-NAO-TIS200-3_2008.iso in your VM (use the virtual cdrom in vmware player and attach to iso file) and open TIS2000 (double click the icon on your desktop) when TIS opens it will ask you if you want to upgrade click yes.
    15. After the upgrade completes you have successfully installed TIS2000 2008.3 and the Dongle crack, now we need to configure TIS to use the VXDIAG GM nano
    16. Open TIS2000 from the icon on your desktop, select Configuration menu from the top and select IO Management.
    17. Click the Driver button, click the Browse button, locate the j2534.dll file in the window and click open (installs the J2534 Pass Thru Driver)
    18. Now click the Add button (in IO management) enter exacly “Generic Pass Thru” in Logical Name and select “J2534 Pass Thru Driver” in the Driver drop down, click OK.
    19. Select Generic Pass Thru in the list and click Properties, in the Device Name drop down select VXDIAG, (ALLScanner) and click ok then click close to close IO Management.Now TIS2000 software is installed and configured all you have to do is connect your VXDIAG device to the PC / VM. To do this first use a usb and connect it to the PC then in the VMWare player menu go in removable devices and connect the Future Devices USB to serial converter. At this step my windows install didn’t have the basic usb to serial drivers so I connected the VM to the network (if not connected use the VMWare player menu to connect the network) and windows downloaded them from the net and installed the device as com3. you are now good to go.At this point you can now click on SPS in TIS2000 select Generic Pass Thru as your device and your good to program!!Satisfied, VXDIAG VCX NANO GM device works as a clone to the GM MDI.

    Credits to wizzardsl writing for the how-to’s for us.

How to solve “GDS2 Days Remaining Until Lease Expires 1”

Purpose:How to solve GM MDI GDS2 software “Days Remaining Until Lease Expires 1” and “GM MDI software is out of date”.

Here you are:

Part 1: Solution to “GM MDI software is out of date”

If any of the GM MDI (item no. SP163, SP163-CSP163-DSP163-E) got the error ” GM MDI software is out of date”.

GLObalTISmdi recovery-01

Follow the 5 steps to do:

  1. Hold on the start button, ready to connect the power supply.

GLObalTISmdi recovery-02

  1. Hold on this button, connect the power supply, the power light on, wait for 10 seconds.

GLObalTISmdi recovery-3

  1. When all the lights turn on, release the button and the machine enters the recovery state.

GLObalTISmdi recovery-0

  1. Connect the USB cable to the computer, ready to recover.

GLObalTISmdi recovery-05

  1. Open GM MDI Manager and choose “Recover”

Done.

Part 2: Solution to GM MDI GDS2 software “Days Remaining Until Lease Expires 1”

Actually, GM MDI already fixed the bug that GDS2 software displayed “Days Remaining Until Lease Expires 1”, that means the newest GM MDI won’t have this error any more.

Now:

gm-mdi-gds2-software-activation-01

Before:

gm-mdi-gds2-software-activation-02

In the paste, GM MDI user can follow the next steps to fix the problem.

There is a icon on the software desktop, open this icon to follow the operation guide, it will tell how to adjust the time.

They way to activate GM MDI GDS2 software:

  1. Reset computer time/date

1) Run “lease time” in the computer’s start menu, if GDS2 is pre-installed

gm-mdi-gds2-software-activation-03

gm-mdi-gds2-software-activation-04

2) Click on “Stop ALGM Service”, change data and time in “Date” and “Time” column. Make sure the date and time are correctly set.

3) Check and confirm the “Leasetime” is completely consistent with the computer system time, if not same, please change your PC date and time.

gm-mdi-gds2-software-activation-05

4) Select the date and time of the time zone (Your local exact time ).

gm-mdi-gds2-software-activation-06

2.Activate GM MDI GDS2 software

1) Connect your computer with network, browse to:

2) Select user account, then click on “ok”.

gm-mdi-gds2-software-activation-07

3) Press “Continue”

gm-mdi-gds2-software-activation-08

4) Click on “OK” button when the system display new Tech2 version.

gm-mdi-gds2-software-activation-09

5) Click on “OK”.

gm-mdi-gds2-software-activation-010

6) Select “GDS2” Tab and then press on Run GDS2 button.

gm-mdi-gds2-software-activation-11

7) The system will install JAVA software automatically.

gm-mdi-gds2-software-activation-12

8) After installing the JAVA, the system will automatically lease renewal.

9) After lease renewal, start MDI GDS software, the system will display the new lease the remaining days in the lower-left corner of software program.

Thanks.

Please enjoy.

GM MDI serial number: How to get new serial

Here are some great tips and guides of GM MDI clone serial number update  from HMM Forum,Collected by OBDexpress.co.uk

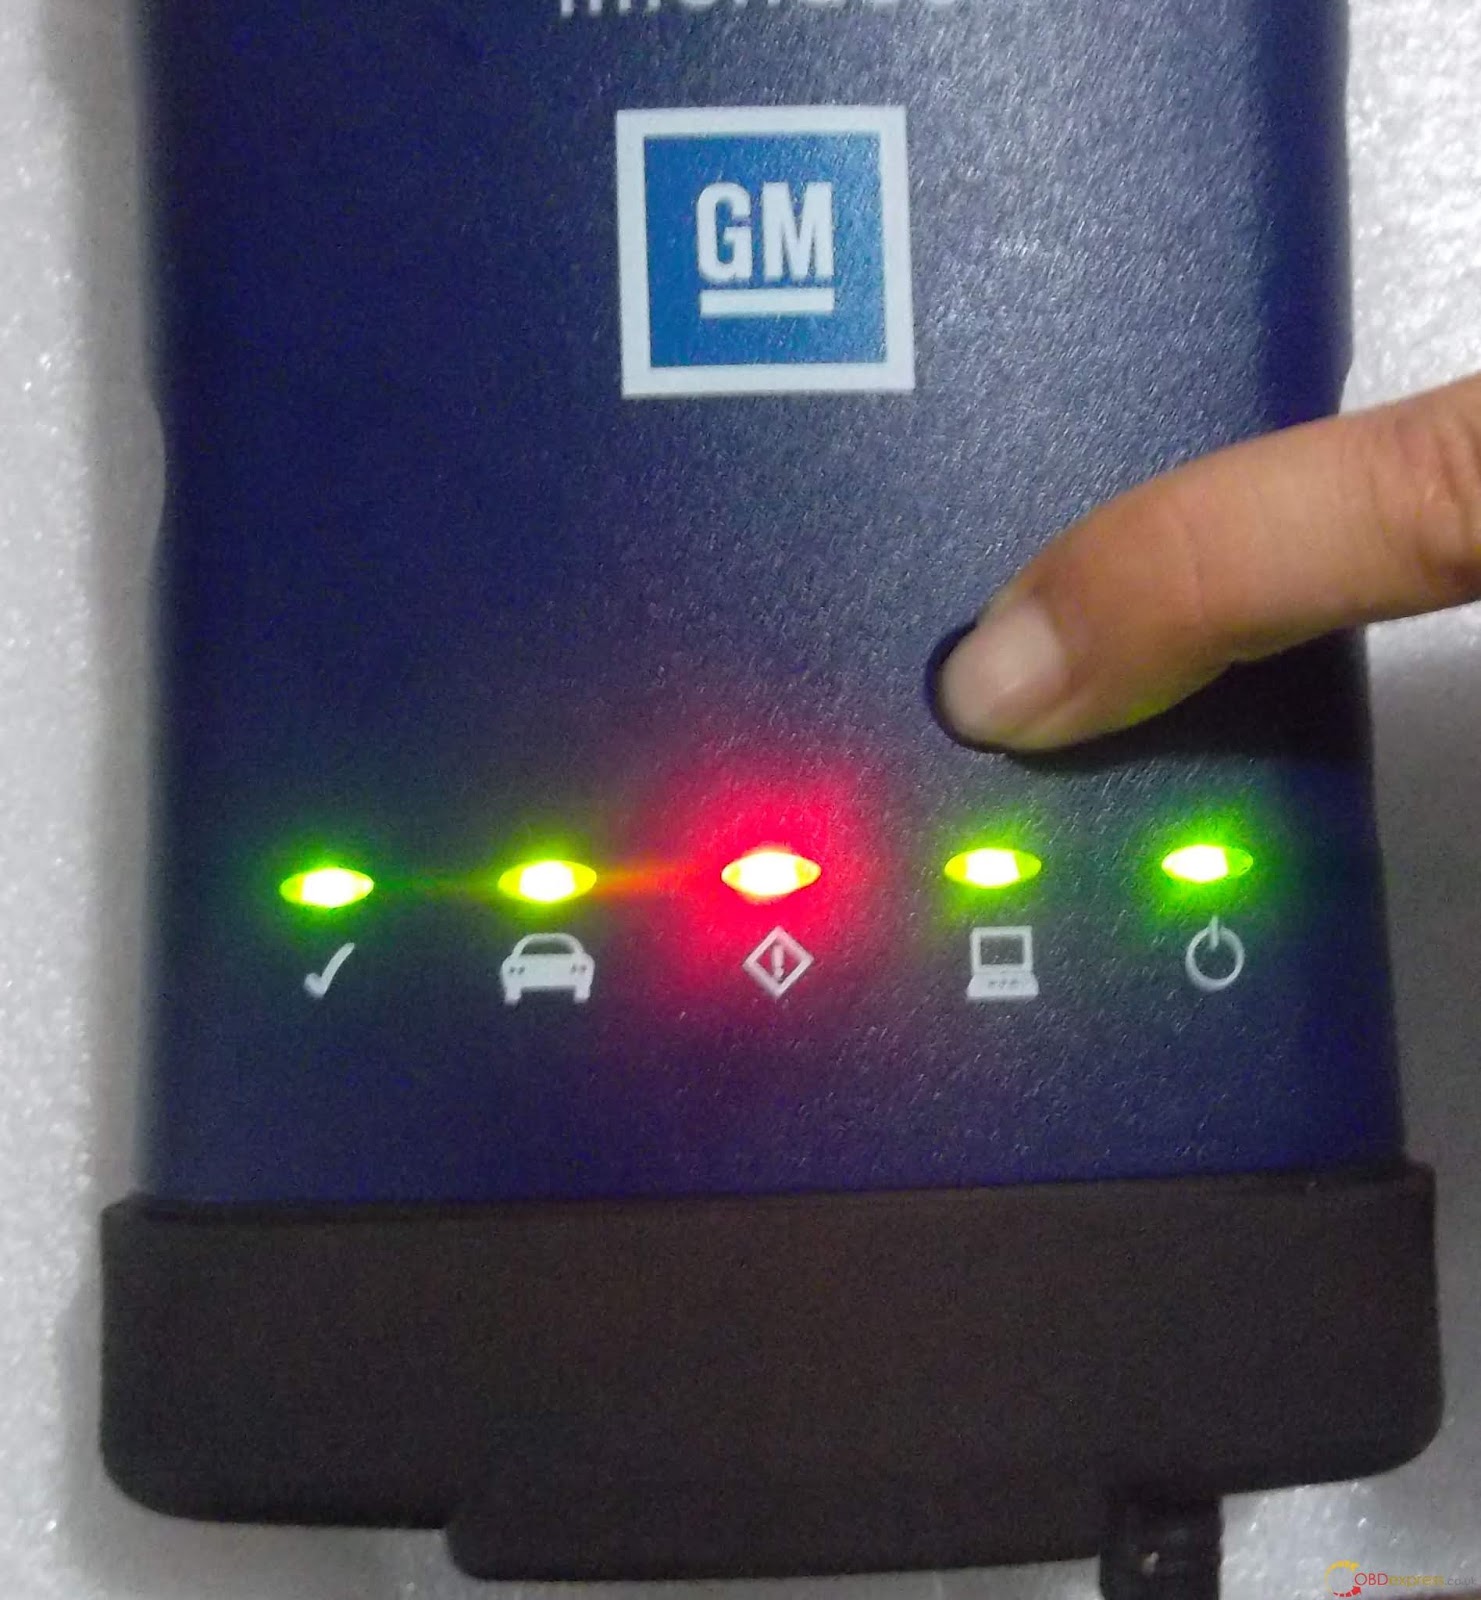
The GM MDI serial number is in the 16mb on board flash memory – the intel chip on the computer sub-board.

You can get u-boot access by making up a serial cable. Signals are available on the 8 pin mini din on the outside of the MDI case. pin 1 goes to PC TX (MDI

RX), pin 2 goes to PC RX (MDI TX). Pin 3 goes to ground. Then when you boot:

Quote:U-Boot 1.1.4 (Dec 21 2007 – 12:11:55) ETAS VCI
(r13006)

U-Boot code: A3F00000 -> A3F218F0 BSS: -> A3F27524

RAM Configuration: TRITON 270 II

Bank #0: a0000000 64 MB

Bank #1: a4000000 64 MB

HW Configuration: (0x207) MDI VCI with SMSC9116

Found P30 Flash, unlocking all blocks: 130

Flash: 16 MB

In: serial

Out: serial

Err: serial

Hit any key to stop autoboot: 0

$ help

? – alias for ‘help’

askenv – get environment variables from stdin

autoscr – run script from memory

base – print or set address offset

bdinfo – print Board Info structure

boot – boot default, i.e., run ‘bootcmd’

bootd – boot default, i.e., run ‘bootcmd’

bootm – boot application image from memory

bootp – boot image via network using BootP/TFTP protocol

cmp – memory compare

coninfo – print console devices and information

cp – memory copy

crc32 – checksum calculation

dhcp – invoke DHCP client to obtain IP/boot params

echo – echo args to console

erase – erase FLASH memory

exit – exit script

flinfo – print FLASH memory information

flock – physical lock of Strataflash

funlock – physical unlock of Strataflash

go – start application at address ‘addr’

help – print online help

iminfo – print header information for application image

imls – list all images found in flash

increnv – increment environment variables

itest – return true/false on integer compare

loadb – load binary file over serial line (kermit mode)

loads – load S-Record file over serial line

loop – infinite loop on address range

macaddr – display or store MAC address in Strataflash

mapadd – add a memory map item

mapdel – delete a memory map item

mapinfo – display the memory map information

md – memory display

mm – memory modify (auto-incrementing)

mmcinfo – get info on mmc(sd) card

mtest – simple RAM test

mw – memory write (fill)

nfs – boot image via network using NFS protocol

nm – memory modify (constant address)

ping – send ICMP ECHO_REQUEST to network host

pinit – PCMCIA sub-system

printenv- print environment variables

protect – enable or disable FLASH write protection

rarpboot- boot image via network using RARP/TFTP protocol

reset – Perform RESET of the CPU

run – run commands in an environment variable

saveenv – save environment variables to persistent storage

serialnum – display or store serial number in Strataflash

setenv – set environment variables

sleep – delay execution for some time

test – minimal test like /bin/sh

tftpboot- boot image via network using TFTP protocol

version – print monitor version

The problem is the serial number and MAC flash partitions are misaligned from
the flash erase block boundaries, which forces them to mount read only. Because
of this the update commands don’t work

Code:

$ serialnum
Serial number: 1220-22129579
$ serialnum 1220-12345678
Error: start address not on sector boundary
Failed to read same serial number back from Strataflash

I think that if we mapped a memory partition at 0x00FE0000 with size 0x00020000
then we would be able to erase that partition and load a new one via ethernet /
tftp. This 128k block would cover both the serial and mac paritions. Both these
partitions have checksums which would need to be figured out and calculated.

What you have been editing is the equivalent of the MDI registry. Once the

serial and mac are changed in flash then a re-flash of the device should put

the new numbers in the registry and they should persist over device firmware

updates. I expect duplicate mac addresses are as relevant as the serial number

duplicates on your lan.

Quote:$ mapinfo
Name Location Size Type Source Guard
—- ——– —- —- —— —–
boot 0x00000000 0x00040000 Flash bootargs Off
bootvars 0x00040000 0x00020000 Flash bootargs Off
linux1 0x00060000 0x00180000 Flash bootargs Off
initrd1 0x001e0000 0x00600000 Flash bootargs Off
linux2 0x007e0000 0x00180000 Flash bootargs Off
initrd2 0x00960000 0x00600000 Flash bootargs Off
linuxvars1 0x00f60000 0x00020000 Flash bootargs Off
linuxvars2 0x00f80000 0x00020000 Flash bootargs Off
serialnum 0x00ff0000 0x00008000 Flash bootargs Off
macaddress 0x00ff8000 0x00008000 Flash bootargs Off
zImage 0xa0008000 0x00200000 DRAM Initial Off
scratch 0xa2000000 0x00a00000 DRAM Initial Off
script 0xa2a00000 0x00100000 DRAM Initial Off
Stack 0xa3e9ff80 0x00020000 DRAM System On
GD 0xa3ebff80 0x00000080 DRAM System On
Heap 0xa3ec0000 0x00040000 DRAM System On
Text 0xa3f00000 0x000218f0 DRAM System On
BSS 0xa3f218f0 0x00005c34 DRAM System On

The sdcard is just the /usr/local/ portion of the firmware. The rest is in the
16mb flash.

Be careful, its super easy to brick your MDI Interface with these tools.

Figured it out.
Mount the sdcard parition 1 under linux, and rename telnetd.sh-disabled to
telnet.sh in /bin. While there I also edited the init script and added this
near the start to make the prompt nicer:

Quote:export PS1='[\u@mdi \W]\$ ‘

Access u-boot (38400 baud, see previous post), and at the prompt type:

Quote:askenv setbootargsprimary

Please enter ‘setbootargsprimary’:run normalargs addinit addconsole addeth

addprimary;setenv bootargs ${bootargs}

mtdparts=flash0:256k(boot),128k(bootvars),1536k(linux1),6144k(initrd1),1536k(linux2),6144k(initrd2),128k(linuxvars1),128k(linuxvars2),32k@16320k(serialnum),32k(macaddress),128k@16256k(id);

boot

The MDI will boot and start a telnet server on its IP and have a new flash
partition configured as /dev/mtd10 called ‘id’. This will align with the erase
block so can be updated. Check in /var/log/messages for the presence of ‘id’
without it being forced readonly.

Telnet in and rip a copy of mtd10 with dd, and send it to an ftp server you

have setup on your lan.

Quote:[root@mdi ~]# cd /tmp
[root@mdi tmp]# dd if=/dev/mtd10 of=mtd10.img
256+0 records in
256+0 records out
[root@mdi tmp]# ls -l mtd10.img
-rw-r–r– 1 root root 131072 Jan 1 00:07 mtd10.img
[root@mdi tmp]# ftpput -u <user> -p <pass>
<ip> mtd10.img mtd10.img

Now load up mtd10.img on your pc in HxD or Hexworkshop. The serial is at
0x10000 with a crc32 checksum of 0x10000->0x17FFB at 17FFC (LSB).

MAC is at 18000 with a crc32 checksum 0x18000->0x1FFFB at 1FFFC.

Update both (just change the last couple of numbers), and use the calculate

checksum feature of the hexeditor to calculate crc32 the sums of of the ranges

and save the new sums in the bin (remember to enter them in LSB format).

Now pull the files back to the mdi, and update flash:

Quote:[root@mdi ~]# cd /tmp
[root@mdi tmp]# ftpget -u <user> -p <pass>
<ip> mtd10-new.img mtd10-new.img
[root@mdi tmp]# cd /usr/local/mtd/
[root@mdi mtd]# ./flash_unlock /dev/mtd10
[root@mdi mtd]# ./flash_erase /dev/mtd10
Erase Total 1 Units
Performing Flash Erase of length 131072 at offset 0x0 done
[root@mdi mtd]# ./flashcp /tmp/mtd10-new.img /dev/mtd10
[root@mdi mtd]# dd if=/dev/mtd10
of=/tmp/mtd10-readback.img
256+0 records in
256+0 records out
[root@mdi mtd]# md5sum /tmp/mtd10-new.img
/tmp/mtd10-readback.img
1a1f4fb7db878218c558b45c0db50c9f /tmp/mtd10-new.img
1a1f4fb7db878218c558b45c0db50c9f /tmp/mtd10-readback.img

Now reboot the MDI,
and hold down the power button so it goes in to recovery mode. Use MDI manager
to recover the device. Once completed it’ll have the new serial and mac.

I expect that the cloners will find this thread and soon they won’t all have

the same serial anymore. But if you already have one then you can do this

yourself, so long as your careful and make sure everything is going to plan and

makes sense to you as you go.

(Many many many thanks to gmtools at
https://mhhauto.com/Thread-GM-MDI-serial-number?)

Source:http://blog.obdexpress.co.uk/2018/12/06/how-to-update-cloned-gm-mdi-serial-number/

Mangoose Pro GM II clone: same as the Drew Tech?

Look here: Mangoose Pro GM II functions and features – YOU HAVE TO KNOW before purchase

Mangoose Pro GM II clone

The clone abilities: same as the original

The china clone Mongoose Pro GM II is verified to work perfectly like the original from Drew Tech, used for diagnostics and programming, module recovery and reprogramming.

In detail…

Plug and play: yes!

The Mangoose Pro GM II is plug and play. Make sure to install the Tech2Win driver if you want to use the application.

GM diagnostics and programming: confirmed!

Mangoose Pro GM II will work with SPS, GDS2 and Tech2Win.

Module recover and reprogramming: confirmed!

Even the cheap Mangoose China clone is able to recover and reprogram modules perfectly and works with the newer h***ed 2017 GDS2!!!

SPS programming speed: fast!

The MongoosePro GM II appears to flash as quickly as the MDI.

The MongoosePro GM II is definitely quicker than the Tech 2.

The MDI cost 4x more than the MongoosePro GM II but it is not 4x faster.

“Data Bus Diagnostic”: compatible!

Drew Tech has stated that as of early March 2015, the Mongoose Pro GM and the CarDAQ-M are both compatible with GM’s “Data Bus Diagnostic” Tool software.

Tech2win, GDS2, SPS: compatible!

The Mongoose Pro GM II ALMOST does everything the MDI does.

– Module reflashing with SPS

– Diagnostics with Tech2Win software

– Diagnostics with GDS2 software.

Mongoose Pro II vs GM MDI:

GM Mangoose PRO only for Opel/Vauxhall/GM with Tech2Win and GDS2.

Full coverage diagnostic and SPS programming

GM MDI can be use as a passthru for other software too

This is one of the difference

Both are good

http://blog.obdexpress.co.uk/2018/08/21/mangoose-pro-gm-ii-purchase/