Category Archives: xtool

Xtool D8 OBDII Diagnostic Scan Tool, worth buying?

Xtool D8 is an impressive car scanner that can handle a lot of things and then some. As a DIYer, I get lost in some of its features which means a more knowledgeable DIYer or a professional can take advantage of everything Xtool D8 has to offer, save time, figure and solve car problems much faster, etc.

Here is a real review from brianok100 on XTOOL D8 Professional Diagnostic OBDII Scan Tool for your references


Part 1. XTOOL D8 Package Overview:

So now we’re into the box, it’s just a standard plastic blow mold case, nothing spectacular, but again it’s nice to have something to put your scan tool, you got your manual and a serial number and an activation code, get your power brick with a USA plug or a overseas plug, you’ve got your data cable and you got the VCI, it’s really just an OBD2 adapter that goes to one end of this data cable.


Now I will say first off, the one particular downside to this a scan tool that I wasn’t crazy about was it does not offer Bluetooth or a wireless connectivity to the vehicle, gets wired only. Now I will say there’s some pros and cons to that the wireless ones seem a potentially some of them seem to have a bit of a latency or a bit of a delay when populating live data streams or when sending a bi-directional command and with a wired you know scan tool, that latency that delay is either greatly reduced or not or gone altogether.

This particular data cable has two different ends, one end goes into the adapter, one end goes into the adapter, and then this one would plug into your OBD2 port and then another end would plug into the top of your scan tool.


Part 2. XTOOL D8 Main Unit Outlook Review.

Anyway, let’s get to the Xtool D8 scan tool.

So alright, let me move this case out of the way the scan tool has a camera on back, it’s got your data connection for the cord, a power port, one usb type A port and a power button.


Xtool D8 has the back bracket, you can stand it up on a desk or you can hang it on your steering wheel, okay so let’s check out the tool itself, this again is called the D8 and I suspect the D8 stands for diagnostic scan tool with 8 inch, this is the 8 inch screen, they do make a D7 and which is a 7 inch screen so that just stands to reason.


The other thing I believe Xtool D8 was intended to directly compete with Autel 808 which is an also an 8 inch scan tool, now I’ve had an Autel MK808 and they make several different versions of that so don’t quote me here, it was the Bluetooth version, so it was wireless to the vehicle, but that one didn’t have very much for bi directional control whatsoever, a few special functions, and you can roll A window up and down here and there, but you couldn’t cycle a evap purge valves or engine fans or fuel pumps or anything like that, whereas Xtool D8 will do all of that, so in that sense now like I said they make a few Autel 808, but you know I can’t speak for all of them. Xtool D8 scan tool is far better than Autel 808 that I had.


Part 3. How does Xtool D8 work?

1. buy one OBD2 extension cable

Let me get the cord hooked up and I’ll show you how Xtool D8 diagnostic Scan tool  works, okay so I’ve got the OBD2 connector, put on the end of the data cable here and this is a corded only tool and one of the downfalls is the cord that comes with it is not terribly long I think it’s about 5 or 6 feet, so I’ll put up a couple pictures here on the screen of some options, you can buy OBD2 extension cables, and that’s the key to the cable, if you buy just a standard OBD2 cable, if it doesn’t say extension cable it won’t work, what you need is the extension cable so that one end is female and the other end is male, so it can go between here and your car and you effectively lengthen and you put some extra length onto this cable


2. Start scanning

So to give you an idea here we can go to auto scan and it’ll just start scanning.

It detected we are in a GM, this thing should Auto VIN, I’m in a “GMC K sierra- 4WD”, the vehicle information is correct, I do not have navigation I have a base, I have up level radio and I have dual zone manual, click “OK”.


3. Quick scan

So, will just go in “Auto diagnose” and run a full-system all-module scan and this particular truck that has a couple little issues, it’s got some problems with the stereo system, and it does currently have a bad oil pressure sensor, so the oil pressure gauge either reads full 80 or 0 and it’s detected that that’s the power train one there. But so anyway, this will take maybe 2-4 minutes to scan the whole vehicle, depending how many modules your vehicle has, the more that it has the longer it will take.


Okay so we’re back and finished scanning and as you can see I got a couple little issues with the navigation radio, I don’t even have navigation on my radio and that’ll give you and then if you want to go in, this top one is powertrain, you can click on that and then click report and I’ll tell you what all the codes are, it’ll tell you what modules are in and I’ll give you a quick definition here, so I got some audio outputs and oil pressure sensor issues and so that’s the quick scan.


4. Diagnose

If we wanted to do diagnostics, you could either manually go in pick your vehicle or you just hit the Vin here and then click “Auto scan” and we’re going back into the same vehicle but it’s going to ask those same questions again I believe, Okay, so yeah “GMC K sierra- 4WD” and its manual, go to “System diagnose” actually those two main buttons: the top one that said auto scan in the bottom it said diagnose, “Auto Diagnose” and “System Diagnose” these the same two here also,


So I backed out of the “System Type” to go to the diagnose portion of the scan tool and I didn’t have to back out that far.

This shows all the different systems in this particular vehicle, the powertrain, ABS unit, air-conditioning supplemental restraint, you can see all the different modules and for example let’s go to powertrain, you know you go to “Live data”, and this will show all live data in all modules, so we’ll go to “Engine live data” and “Engine data 2”, there’s more than one page.


If you’ll select which particular pigs you’d want to look at on live data, so let’s just for example terminal alternator, terminal command and you know engine speed, let’s just say and then hit OK and there’s the engine rpm and the generator terminal signal command is on.


5. Special functions

We can go to special functions, get fuel trim reset, fuel composition reset and that I want to say one thing here is about scan tools in general and that does if you’re in the market for a scan tool and you’re looking for more than just you know a code if you’re looking for more than just a code reader you want a diagnostic scan tool that has a little bit of functionality by directional control, it’s not the scan tool that’s doing these functions, the computer in the vehicle has to be like for example in this truck here we’ve got a fuel composition reset, well in this era of GM vehicles they produce these cars and trucks without an ethanol or alcohol sensor and the way that determined how much ethanol in the gasoline it kind of calculated it based on fuel tank, fill up events and o2 readings and you know drive time it had a formula for calculating alcohol percentage, the problem was they got confused, the computer and the truck got confused and so in order for GM to fix that they had to go in and put in the software fuel composition reset. Now you probably never going to find this on any other vehicle that didn’t have like, you wouldn’t find this on a Ford truck of the same year or on a Honda Accord from the same year, it’s the vehicle that dictates what menus populate on the scan tool so I’ve had people send me questions or comments to www.xtool.co.uk saying hay can that Xtool D8 scan tool do such and such, on a pick a year make and model and I say well you know I don’t have one of those vehicles to plug into and they’ll say well can’t you just go turn your scanner on and you put in that make and model information, well no I can’t because unless the scan tool is plugged into the vehicle, you can’t go into the menus, it can’t go past like the first menu because it’s the computer in the car that dictates the menus to populate on the screen of the scan tool.


So Xtool D8 scan tool is not running any of these extra special functions, okay, it’s the vehicle and the computer that’s doing it and it’s just the scan tool that is sending the command, you know sometimes people might buy a scan tool, they see something on the Internet like take for example an ABS auto brake bleed, well, not every vehicle every make and model ever manufactured is capable of running an auto bleed, but they’ll see a video on the Internet of somebody doing it, they’ll buy a scan tool, plug it into their car and then they’ll say well that scan tool junk doesn’t work well, it’s possible it might be a faulty scan tool, but more than likely your make and model wasn’t programmed for an auto bleed, so therefore the scanner can’t send a command to anything and the vehicle wouldn’t know what to do with it if it could.


So but now I will say on the other side of the coin on the flip side, we back out of these menus here, if we go to special functions.

You know like Xtool D8 scan tool claims like what 31 special functions, oil life reset, throttle learn , electronic parking brake, steering angle sensor, instrument cluster, gearbox match and they got all these functions. Well on opposite of what I was just saying when the scan tools list these special functions, but we are sitting in a 2006 Chevy pickup and I don’t have an electric parking brake, battery reset or back when this truck was made, there was no such thing as a battery module, you just put a new battery in a vehicle ran so or like a DPF well that’s only for diesels and I have a gas motor, so you know kind of opposite what I was saying before where it’s the scan the vehicle that dictates the menus that populated the scan tool, well when you look at the special functions that they brag about or that they advertise you know they list them all whether your vehicle is capable of it or not so it’s the opposite, so anyway, that was the special functions.


Part 4. Xtool D8 Update via Wifi


Xtool D8 update over here, this is just if you were on WiFi, any updates and by the way this scandal gets 3 years of free updates, so this is where you go on your home wi-fi type in your network name and password boom, it’s on WiFi and it will download all the updates just one touch it automatically updates the scan tool by itself.


Part 4. Xtool D8 Setting

By clicking on “Setting” there is the settings within the diagnostic software.


Part 4. Xtool D8 Extended functions

By clicking on “extended functions” you got “Xcloud” and “Endoscope”.

Endoscope is just like a little camera on the end of a wire and it would plug into your usb port.

Xcloud not really sure what that is, if you can store files on the cloud or whatever


Part 5. Xtool D8 “Remote Control”.

Hit the back button “Remote control”, If you want to allow somebody at Xtool to remote into your scan tool and give you assistance with something.


Part 6. Diagnostic Report

That’s where you would do that report, this is where you get diagnostic reports and all of your previous vehicles that have been hooked to the scan tool.


This is just your typical android scan tool, you know you can go on here’s your apps right here you can go on a browser.

I’m not on WiFi right now, but there’s a adobe reader, there’s the camera of course on the back.


Xtool D8 tablet and of course you can even play games on here, anyhow, you get the point will go back into the diagnosis software and there you go.


To sum up

This is Xtool D8 Scanner it’s pretty slick, it shows all live data on all modules, it has all full bi- directional control on all modules, as long as the vehicle is programmed to do it, you can’t do something that the vehicle isn’t programmed to do from the factory.


the one downfall is that it’s a corded device but there’s also some pros to being accorded device there’s less latency and less delay, you can get an extension OBD2 cable 10- 15 dollars.


So check it out, see what you think and just one more thing about scan tools I want to finish off by saying there’s no perfect scan tool, they are glitches with all of them, you may find an any brand that you buy that your vehicle should have a special function, or should have a full bidirectional control that should be functional on your vehicle and a particular scan tool just won’t send the command that is possible, those glitches exist in all brands of scan tool, it doesn’t matter where you buy them whether it be for an import brand or a high-end tool truck brand, you know you could spend 5000 or 8000 dollars on a on a brand name tool truck USA scan tool and still have problems not being able to send certain commands or be able to read certain things.


So with everything I just said about the vehicle’s computer populated the menus that is true, but every brand has its own little glitches here and there. so if you do buy a scan tool and for a specific function and all of a sudden you’re having trouble with it just send the manufacturer Xtool. an email and they should be able to send out a software patch to fix that for you so alright done talking about that anyway that’ll do it for now.

Thanks to Xtool.co.uk for making this article:http://blog.xtool.co.uk/xtool-d8-obd2-bidirectional-diagnostic-tool-real-feedback/
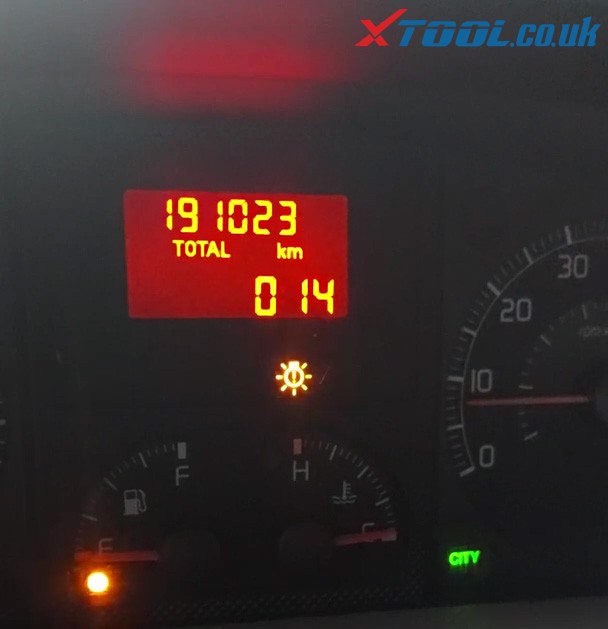
How to change mileage for 2007 Fiat Idea with XTOOL X100 PRO2

Purpose: Change odometer mileage reading on a car
Model: 2007 Fiat Idea
Tool option: XTOOL X100 PRO2 
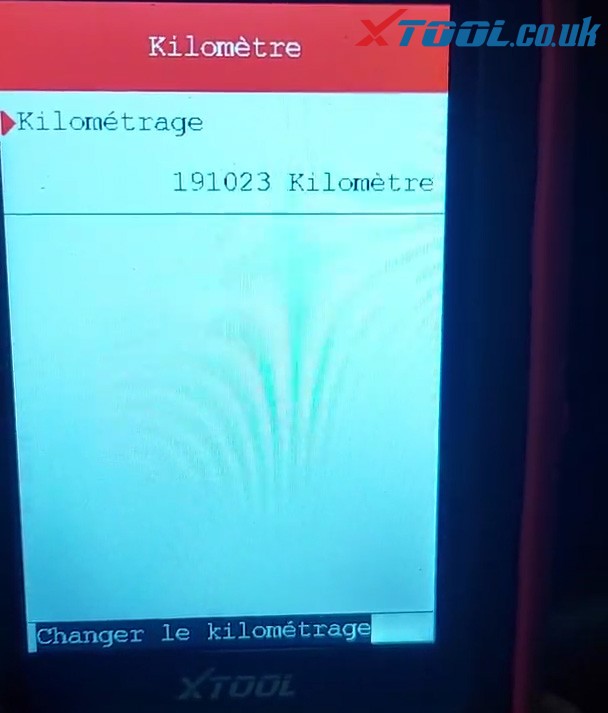
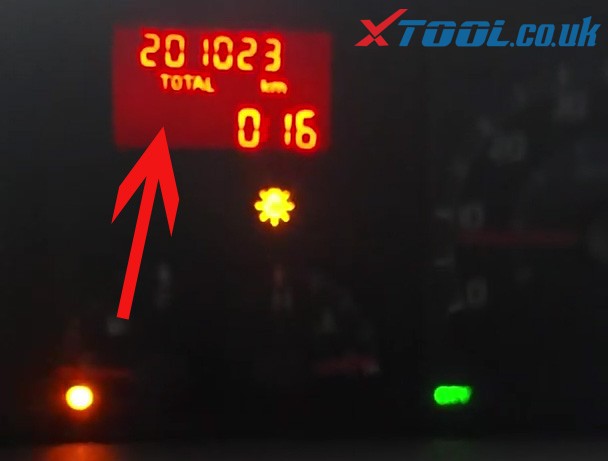
Via OBDThe  current mileage: 191023KM

2007 Fiat Idea Odometer Correction With Xtool X100 Pro2 (1)

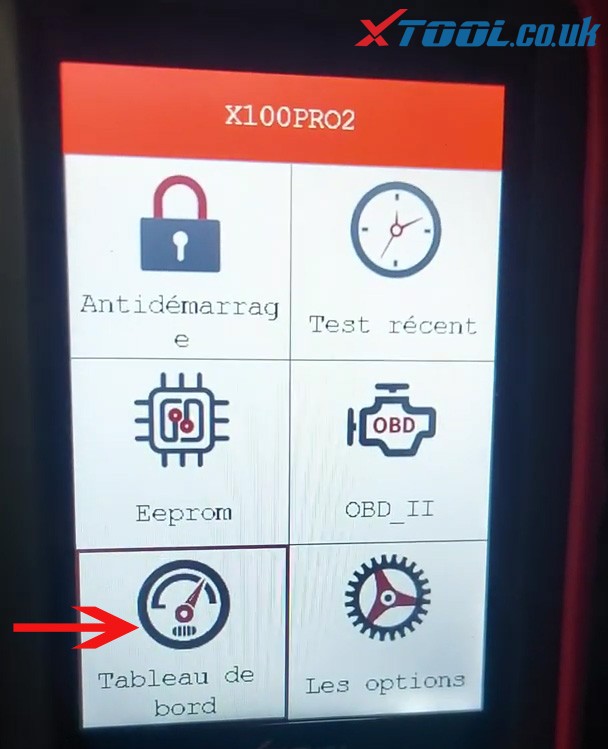
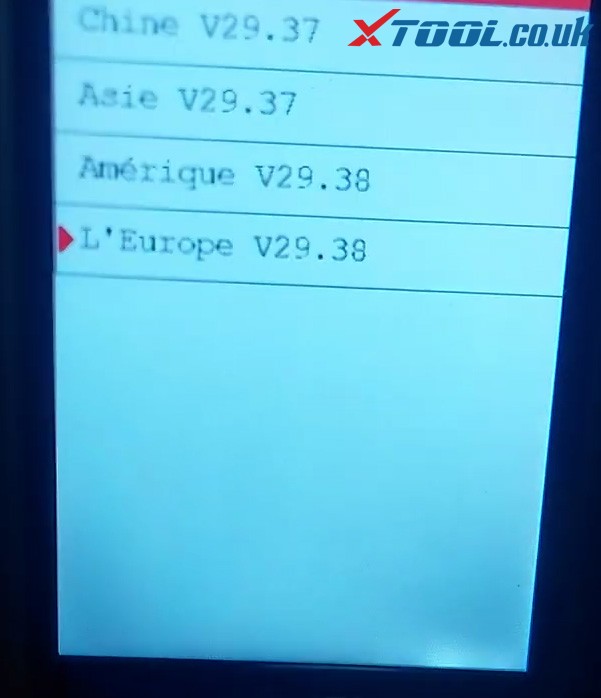
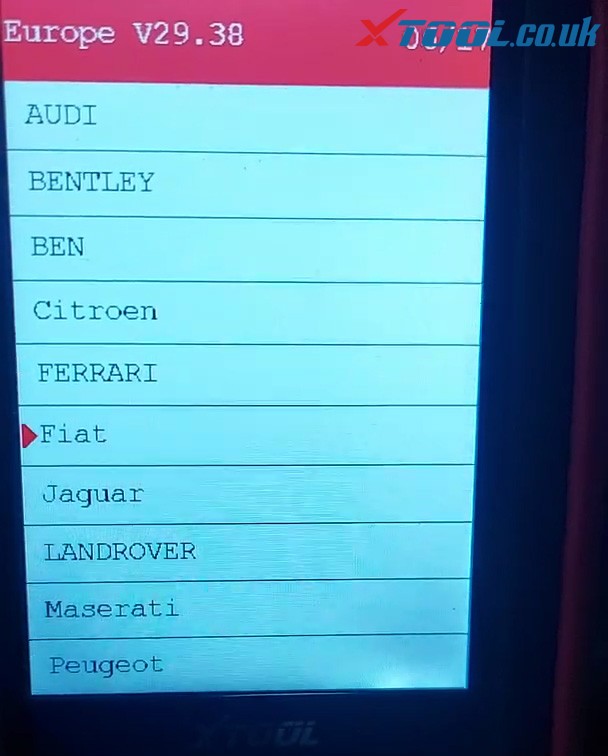
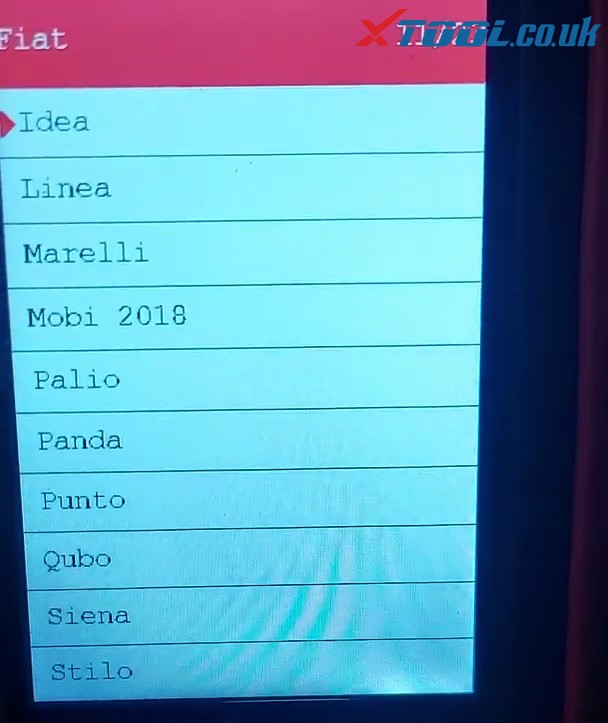
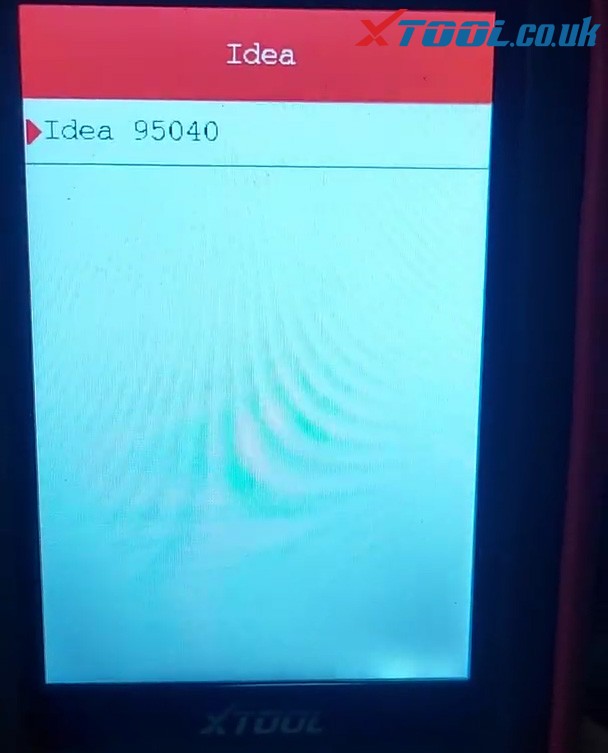
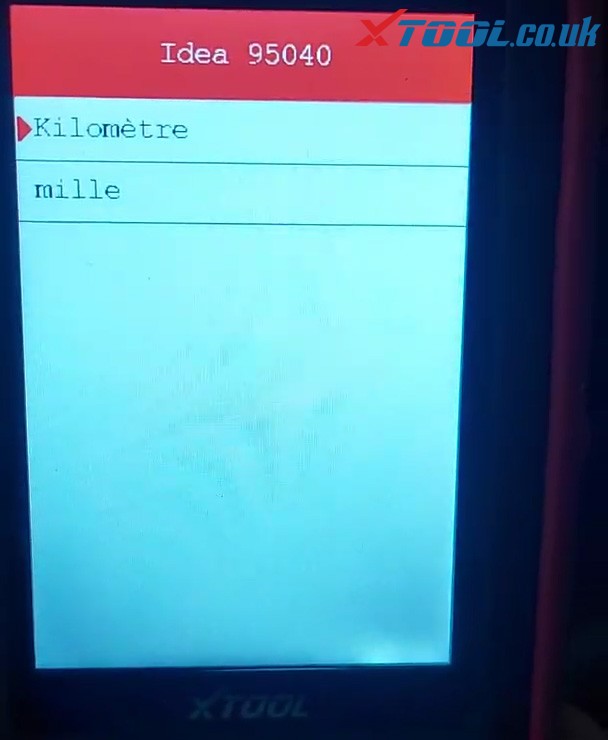
ProcessStep 1. connect Connect the Xtool X100 PRO2 to the vehicle via OBD-port.Step 2. Vehicle select:>>Dashboard>>Europe>>Fiat>>idea>>Idea 95040>>kilometer

2007 Fiat Idea Odometer Correction With Xtool X100 Pro2 (2)
2007 Fiat Idea Odometer Correction With Xtool X100 Pro2 (3)
2007 Fiat Idea Odometer Correction With Xtool X100 Pro2 (4)
2007 Fiat Idea Odometer Correction With Xtool X100 Pro2 (5)
2007 Fiat Idea Odometer Correction With Xtool X100 Pro2 (6)
2007 Fiat Idea Odometer Correction With Xtool X100 Pro2 (7)

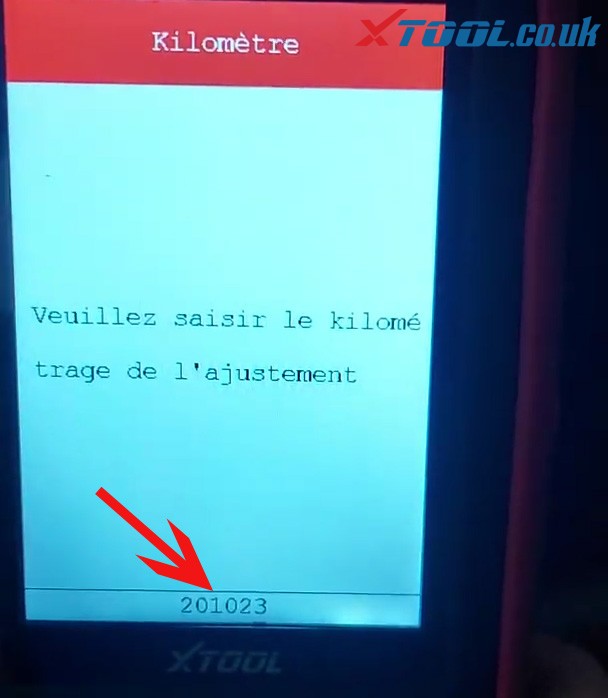
     Step 3. After confirming the current mileage, Input the new value,here we input 201023 km

2007 Fiat Idea Odometer Correction With Xtool X100 Pro2 (8)
2007 Fiat Idea Odometer Correction With Xtool X100 Pro2 (9)

 Step 4. the new mileage is  201023km

2007 Fiat Idea Odometer Correction With Xtool X100 Pro2

Awesome! The mileage is changed successfully, The whole process takes less than a minute, Xtool x100 pro2 Programmer is very worth having! Thanks to xtool for making this article:http://xtoolsupport.com/xtool-x100-pro2-how-change-odometer-in-fiat/

Best way to turn off seat belt chime with Xtool V401

Today, I will show how to disable the seatbelt alarm on a Volkswagen Passat B5 using Xtool V401. I’m driving a Passat B5 model but they should work on most other Volkswagens, just check with the reference information, I’m gonna link above for the specific instructions for your car.

How to use Xtool V401 Disable Seat Belt Alarm on VW Passat 01

So what I’m talking about disabling the seatbelt alarm is when you turn the ignition on a Volkswagen.

It gives you the fast seatbelt warning and it beeps two, even if the car is that can be quite annoying if you are sitting out.

How to use Xtool V401 Disable Seat Belt Alarm on VW Passat 02

So in order to turn this off,what we’ve got to do is go into the bag for one and select “Diagnose” -> “Diagnosis systems” -> “Common system” -> “17- Dashboard”

How to use Xtool V401 Disable Seat Belt Alarm on VW Passat 03
How to use Xtool V401 Disable Seat Belt Alarm on VW Passat 04
How to use Xtool V401 Disable Seat Belt Alarm on VW Passat 05

So once you turn out of dashboard, you will notice, there’s a number right here where it says COD: 07235 (it has a number following that), You need to write this down this is the number that we’re going to be modifying in order to turn off the seatbelt alarm.

How to use Xtool V401 Disable Seat Belt Alarm on VW Passat 07

So a quick word about what these numbers mean: the numbers in the first two position indicate what warnings you want on and it works by adding these numbers up and what I mean by that is like if you wanted brake Pad wear warning and seatbelt warning, only you would do 1*2 equals 3 and so the number right here would be 03.

By default I think most of them are 07 which means brake pads, seatbelt and washer fluid warning, like I say that’s 1*2*4 will be 7.

In order to disable one of those you just subtract the corresponding number away from whatever your number is.

So on mine Xtool Vag401, they said the first number was 07, so in order to turn off the seatbelt warning which is 02, I’m just going to subtract 2 from 0, 7 to give me 05.

How to use Xtool V401 Disable Seat Belt Alarm on VW Passat 08

The number in the third position here is what region your car is in and this determines what units your car uses whether it’s kilometers or miles Celsius or Fahrenheit and whether it uses a 12 or 24 hour clock system.

I’m in the USA, so I’ll be choosing USA but of you choose Europe or United Kingdom, it has an added feature where it will also disable the open door alarm where if you open the door and it beats, you can disable that by selecting Europe or United Kingdom as your region, the other regions will not turn off the door alarm.

But bear in mind if you do decide to change to one of these regions, it will change your the units that your car uses to the units for those regions.

How to use Xtool V401 Disable Seat Belt Alarm on VW Passat 09
How to use Xtool V401 Disable Seat Belt Alarm on VW Passat 10

Number in the 4th position is what your service interval is.

If you’ve got T4 cluster, look at these numbers. I’ve got a normal salt cluster, so I’m looking at this number right here in North America they recommend you use number 3 which is no service interval, so that’s what I’m going to be choosing.

How to use Xtool V401 Disable Seat Belt Alarm on VW Passat 10

And then the last number is your distance impulse number and what that is, it’s a relationship between the diameter of your wheel and how many impulse your car sends to the wheel per revolution to determine your wheel speed and in turn determine what your speedometer reads.

So if you change this number, it can change what your speedometer reads whether it’s reading a little bit fast or a little bit slow, so if you decide to change this number you’ll need to test your car with a GPS, in order to make sure what your abdominals is accurate.

How to use Xtool V401 Disable Seat Belt Alarm on VW Passat 11

I’m not going to be changing that though, I’m just gonna be keeping it what it is.

And so like I said make note of this first number in my case COD: 07235 , I’ve got a 2004 Volkswagen Passat B5.

Go ahead and hit enter.

And then scroll down to “07- Code Module”.

How to use Xtool V401 Disable Seat Belt Alarm on VW Passat 12

So I said in order to disable seatbelt alarm which need to subtract 2 from whatever those first numbers were my case, that was 07 so I changed the number to 05.

Number 2 is North American region. Remember, if you want to disable your door alarm make that second earth, make this number 1 or 4.

Service interval 3, because I’m in North America and then this last number is the distance impulse number needs to be 5 for me.

How to use Xtool V401 Disable Seat Belt Alarm on VW Passat 13

And with that we can go ahead and hit enter, and it will program the system.

When it’s all done, it’ll say finished.

How to use Xtool V401 Disable Seat Belt Alarm on VW Passat 14

And before you disconnect to Xtool V401 you need to exit all the way back out to the main menu.

They say that if you don’t go back to the main menu of Xtool V401 before you disconnect it from the power it can interrupt the process on this and potentially mess up this device.

So anyway, now that the car’s been reprogrammed, you can see I turn it off. Yeah, when I turn it back on, no seat belt warning, that’s what we wanted alright.

How to use Xtool V401 Disable Seat Belt Alarm on VW Passat 15

I hope this article helped you and if it did I’d appreciate you subscribing and liking and I’ll leave link to where you can purchase this Xtool V401 code Reader here:http://www.xtool.co.uk/wholesale/xtool-v401-vwaudiseatskoda-professional-tool.html

How to solve XTOOL X100 PAD Stuck on the loading page issue

A question from our customer: after booting the Xtool X100 PAD, I select the OBD2 function, unfortunately, it stays on the loading page.

Xtool X100 PAD Stuck on the loading page problem

Xtool.co.uk Solution:

You should reinstall the software to make your device works again,No need to flash the machine
Xtool scanners with Remote control assistant function,once you get any problems, we will arrange the engineer check the problem fast

XTOOL Quicksupport

How to use Remote control assistant :

  1. Open “quicksupport” on the tablet, and you will have one ID (shown as below), click on “Send my ID”.  
XTOOL Quicksupport 02
  1. Accept the request from Xtool Tech Support to connect your tablet.
  1. Wait to download the software remotely.
  1. Alright, the bug is fixed.

Hope it helps!

http://xtoolsupport.com/fix-xtool-tablet-stuck-on-the-loading-page-problem-via-quicksupport/

Tips tp Xtool A80 Pro Turn Off 2017 Corolla Check Engine Light

Used XTOOL A80 Pro with VCI box to read/write Engine & ECT and clear trouble fault to solve Check Engine Warning Light issue on a 2017 Toyota Corolla


PS : What Does Your Check Engine Light Mean

The check engine light — more formally known as the malfunction indicator lamp — is a signal from the car’s engine computer that something is wrong.

When your car’s check engine light illuminates your dashboard, it’s usually accompanied by a sinking feeling in the pit of your stomach. The light could be a minor issue, such as a faulty gas cap, or it could mean something more serious, such as a misfiring engine.

Eg. Toyota 2017 Corolla check light turn on here


Process:Used Stool A80 Pro to turn off 2017 Co roll Check Engine Light

First of all ,Connect the A80PRO to the vehicle via OBD-port, then connecting XTOOL VCI to the vehicle via the main cable and connecting to the XTOOL tablet via Bluetooth


Step 1: Read Engine & ECT trouble code
 Select Diagnose>>Toyota>>USA>>Automatic detection>>w/o smartkey

Xtool A80 Pro  remove 2017 Corolla Check Engine Light  OK 04
Xtool A80 Pro  remove 2017 Corolla Check Engine Light  OK 05
Xtool A80 Pro  remove 2017 Corolla Check Engine Light  OK 06
Xtool A80 Pro  remove 2017 Corolla Check Engine Light  OK 07

Automatic detection result:

There are six errors here on Engine and ECT


Then back to select >>Read trouble code


Tips to Engine and ECT

This ECU controls fuel Injection, Ignition timing, knock control. Idling engine speed, self-diagnosis function, and backup function In extraordinary circumstances,s, etc..Additionally, It controls automatic transmission


Step 2: Clear Engine and ECT trouble code

 >>Clear Trouble Code>>OK>>OK to erase to done

Xtool A80 Pro  remove 2017 Corolla Check Engine Light  OK 11
Xtool A80 Pro  remove 2017 Corolla Check Engine Light  OK 12
Xtool A80 Pro  remove 2017 Corolla Check Engine Light  OK 13

Finally, turn on the ignition to check the dashboard again, the engine warning light disappears.

Xtool A80 Pro  remove 2017 Corolla Check Engine Light  OK 14

Woks done!

http://blog.xtool.co.uk/

Program Renault scenic 2006, Xtool pad2 better than AUTEL im508

Xtool X100 PAD2 is tested as a great key programmer for Renault Megan, Scénic, Espace, Laguna, Clio etc…

 here is the real feedback and test report from the Facebook group in xtool pad2:

2009 Megane II spare key successfully…

2009 Megane II spare key by xtool x100 pad2

Programming lost card Renault Megane 3… programming in 5 min easy with x100pad.. Happy customer… id4 map pcf 7941

Renault Twingo 2011 all keys lost,Xtool straight in programmed

Renault Twingo 2011 all keys lost by xtool x100 pad2

X100 PAD2 GLOBAL GL ver. You have success add a key – cards for Renault after 2010 (Laguna, Megane Scénic Clio 4, etc. 2010 – 2015)

X100 PAD2 GLOBAL GL ver Renualt

-New card key Renault Laguna
-Immo
-Remote
– 5min.
With x100pad 2 pro

Renault Laguna by xtool x100 pad2 pro

Renault scenic 2006 56
Success reads pin And programmed card with XTool X100 PAD2
Autel im508 failed to read pin
True code failed read the wrong pin
Xtool wins!!! K.O AUTEL ,K.O Truecode!!

AKL on Renault Clio 3. 2 remote keys programmed easy. About 2 mins total. Nice easy job especially with key number in the glove box

Renault Scenic add a card.All ok

2010 Renault Koleos 7941 keycard added. Xpad instructions were not entirely clear but I got there in the end. When done programming, neither key will start car (remote is fine)but leave car for 5 minutes and they will all operate properly

2010 Renault Koleos by xtool x100 pad2

Another Renault kangoo 2007 ph2
All keys lost
Using aftermarket key/ remote
Easy job

Renault kangoo 2006 ph2
All keys lost
Starts and remote works
A happy day with xtool pad2

Renault Megan Scenic 2004 AKL is possible just to add key card new

Renault:
Clio 2 ID46, Kangoo, Master 2, Megane 2, Scenic 2 (before 2008), Clio 3, Modus: OK (akl and add key)

2010 Renault twingo
All keys lost
Read pin
Programmed remote key
Aftermarket key all good

2007 Renault Clio lll
Read pin ok
Programmed key ok
Remote worked and start vehicle
Easy process

2010 Renault traffic
Aftermarket remote key
Work good simple

2010 Renault traffic by xtool x100 pad2

Renault megan 2 2006 add card .All ok with xtool x100 pad2 key programmer 

RENAULT MEGAN 2005 ADD KEY OK .

Renault Sandero Stepway 2013 – pincode fail.
-2007 Renault Espace IV Phase 2 read Immo-Pin: FAIL
-2007 Renault Espace IV Phase 2 add key: FAIL

please look at the Xtool X100 PAD2 / PAD2 PRO Renault function List table:

Xtool X100 PAD2 Renault Function Table V26.87
seriesparagraphvehiclefunction
RENAULT2001-2003Avantime1.Program keys 2、Read pincode 2.1.Type 1
2.2.Type 2
RENAULT2010-2013Duster(Dacia)
RENAULT Espace Blade key
RENAULT2001-2007Laguna Blade key
RENAULT2010-2013Logan (Dacia)
RENAULT2010-2013Sandero (Dacia)
RENAULT2010-2013Symbol (Dacia)
RENAULT-2001Clio1、Program immobiliser
2、Initate new immobilser
RENAULT-2001Kangoo
RENAULT-2001Master
RENAULT2001-2005Clio1.12-digit PIN
2.Free pin code 3.Read BCM Code
RENAULT Clio II1.Program keys
RENAULT Clio II HB
RENAULT Clio II CAMPUS
RENAULT2003-2010Espace Card key
RENAULT2002-2007Kangoo
RENAULT2001-2007Laguna Card key
RENAULT Laguna Keyless
RENAULT2004-2009Logan (Dacia)
RENAULT2002-2007Master
RENAULT2007-2010Master
RENAULT2005-2010Sandero (Dacia)
RENAULT2003-2005Solenza
RENAULT09-10Symbol (Dacia)
RENAULT02-06Trafic 
RENAULT07-14Trafic
RENAULT02-07Twingo
RENAULT02-07Valsatis
RENAULT Valsatis Keyless
RENAULT Clio III Without smart1.Read number of keys 2.Program keys
2.1.Input Pin Code 2.2.Free Pin Code
RENAULT Modus Without smart
RENAULT Modus With smart1.Read number of keys 2.Program keys
2.1.Input Pin Code 2.2.Free Pin Code
3.Program remote 4.Erase remotes
RENAULT Clio III  With smart
RENAULT Kangoo II1.Program keys
RENAULT2010-2016Master
RENAULT2007-2014Twingo
RENAULT-10KOLEOS1.Program keys
RENAULT08-Laguna Card key
RENAULT2008-2012Valsatis
RENAULT10-KOLEOS 
RENAULT LagunaIII
RENAULT2003-2006Megane/Scenic1.Number of keys 2.Program keys
RENAULT2007-2009Megane/Scenic
RENAULT-2015Captur1.Read PIN code 2.Learn keys
RENAULT-2015Clio IV
RENAULT2016-Captur1.Add key
1.1.Read PIN code 1.2.Send PIN To HFM
1.3.Learn keys
   1.4.Backup FLASH 1.5.Recover FLASH
2.All lost key 2.1.Read PIN code 2.2.Create key
2.3.Send PIN To HFM
2.4.Learn keys 2.5.Backup FLASH 2.6.Recover FLASH
3.Help
RENAULT2016-Clio IV
RENAULT2015-Espace V1.Non Smart Key
1.1.Read Number of Keys 1.2.Read EEPROM
1.3.Add Keys 1.4.Learn HFM 1.5.Create Key 1.6.Unlock Key 1.7.HELP
2.With Smart Key
2.1.Read Number of Cards 2.2.Read EEPROM
2.3.Add Cards 2.4.Learn HFM 2.5.Create Card 2.6.Unlock Card 2.7.HELP
RENAULT kadjar IV
RENAULT Koleos II
RENAULT2015-MEGANE
RENAULT2016-Megane/Scenic IV
RENAULT2015-Talisman 

Where to have one Xtool X100 PAD2?

Bought it from

https://www.xtool.co.uk/wholesale/xtool-x100-pad2-pro-with-vw-4th-5th-immo.html

How to fix Xtool H6 pro with kc501 read write BMW cas4 failed?

Problem: I have a Xtool h6 pro with kc501 (same as Xtool A80 PRO), I’m trying to read/write a BMW cas4 with no success, I follow the wiring diagram and tried the 2 methods the app shows. I’ve even connected the kc501 to my pc but still no comms.

Experienced user’s advice:

The black wire and white wire.
Move white wire to the hole in the pcb and try again.

xtool.co.uk engineer replied:

Sometimes we have the same problem with Xtool h6 pro ( H6 PRO = Xtool A80 PRO in the aspect of software  ) , we find out it has a poor welding and then re-solder it again, finally we can read and write the data successfully.

Hope it helps!

http://blog.xtool.co.uk/

How to Reflash / Initialization Toyota Lexus with XTOOL X100 PAD3 SE + KC501

In this instruction, XTool.co.uk will show you a guide on how to use XTOOL X100 PAD3 SE Key Programmer with KC501 to reflash/initialize immobilizer system for Toyota/Lexus
Refresh/ initialize the ECU data for 2001 IS300 Lexus same for Toyota when all keys lost, okay usually you’ll find these years between 1999 and 2001, they usually have a 4C chip in them.

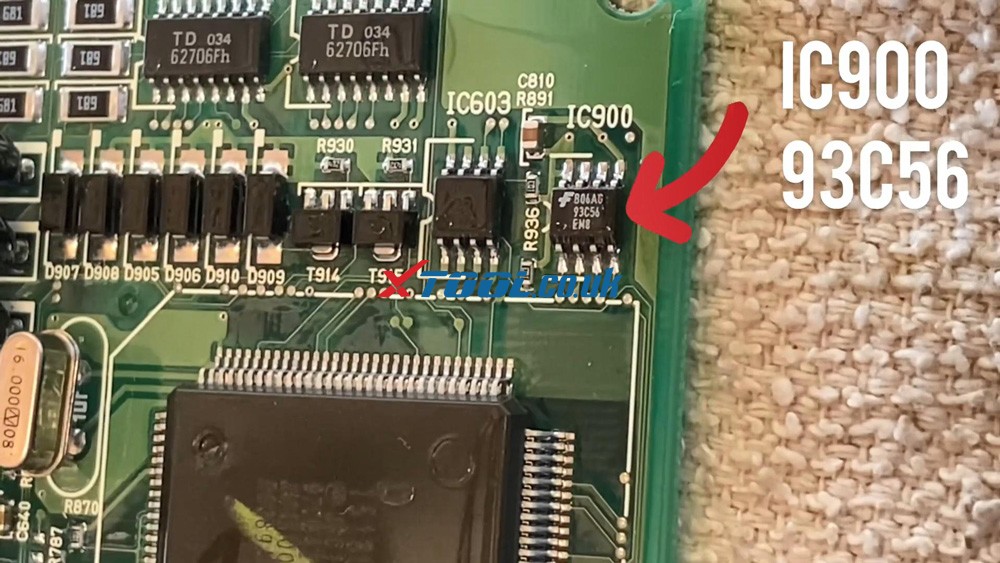
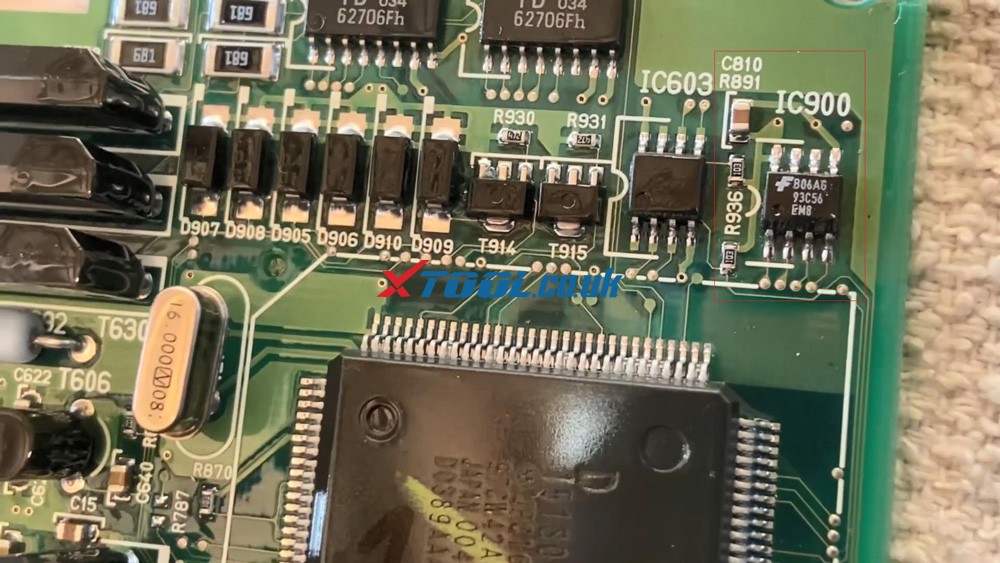
MCU Chip: IC900 93C56
Key: TOY43AT4
Transponder: 4C
key code: Passenger Door Lock

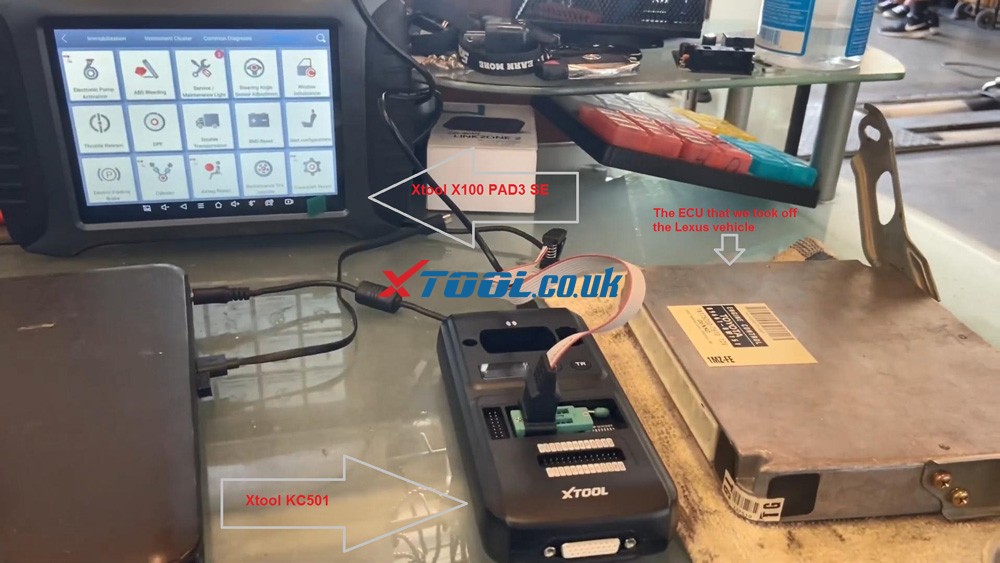
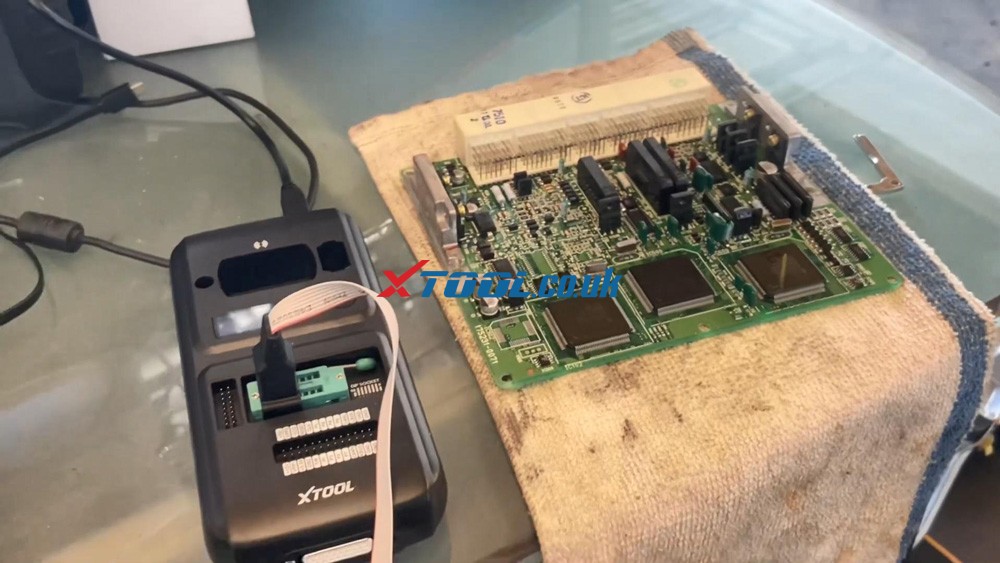
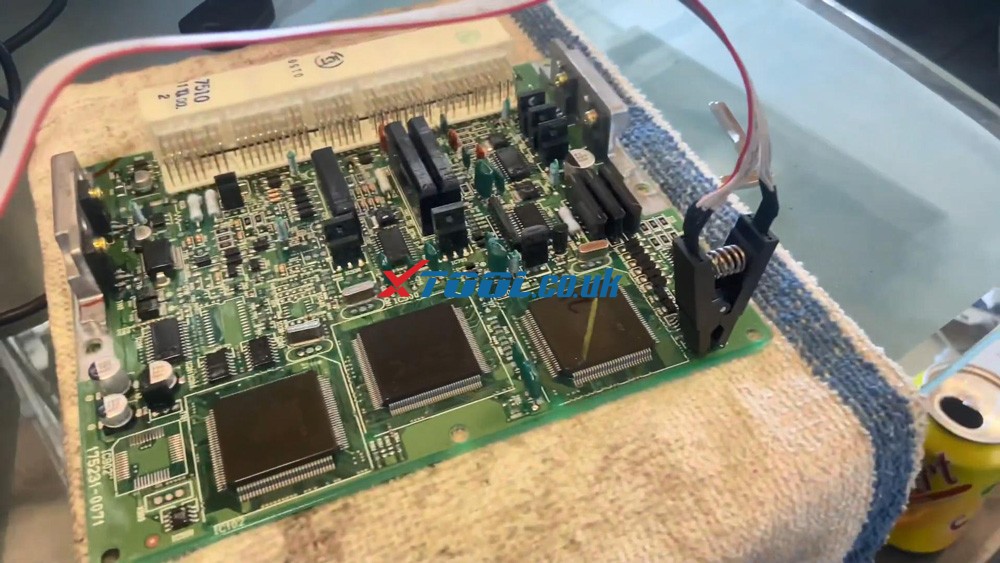
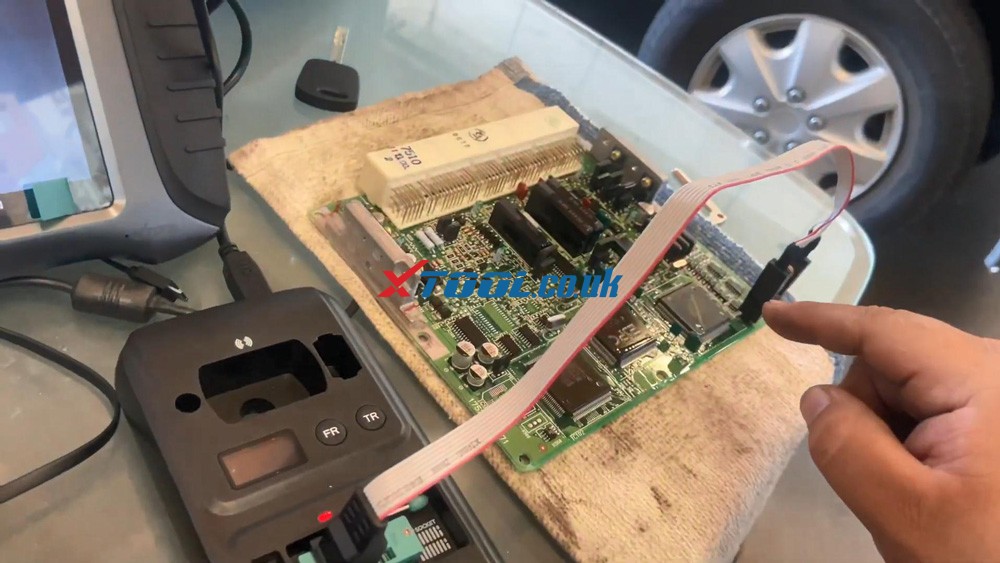
We have the ECU that we took off the Lexus vehicle, a Xtool X100 PAD3 SE, the KC501 with the eeprom 8pin clip.

Xtool X100 Pad3 Se Reflash Toyota Lexus Ic900 93c56 Data 01
Xtool X100 Pad3 Se Reflash Toyota Lexus Ic900 93c56 Data 02

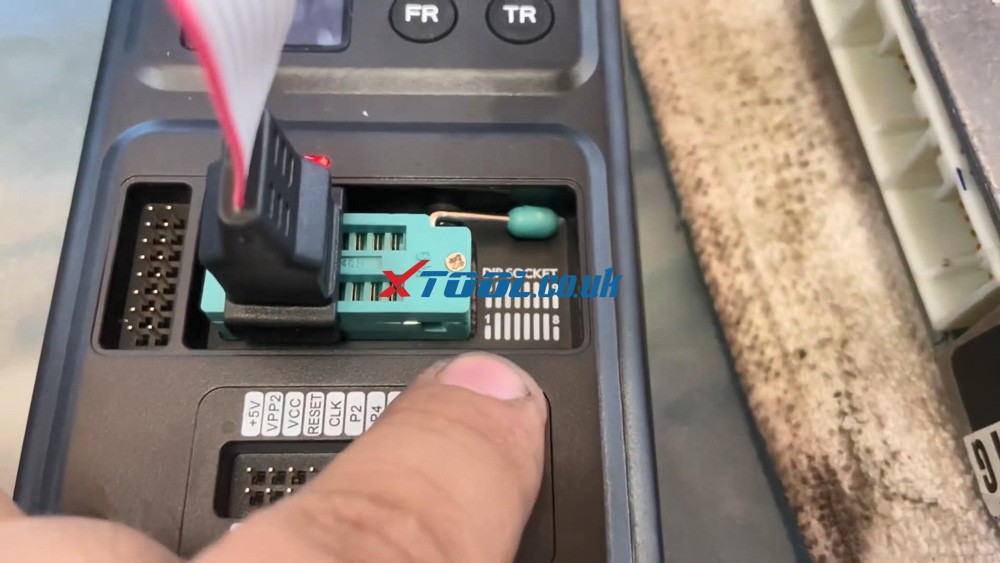
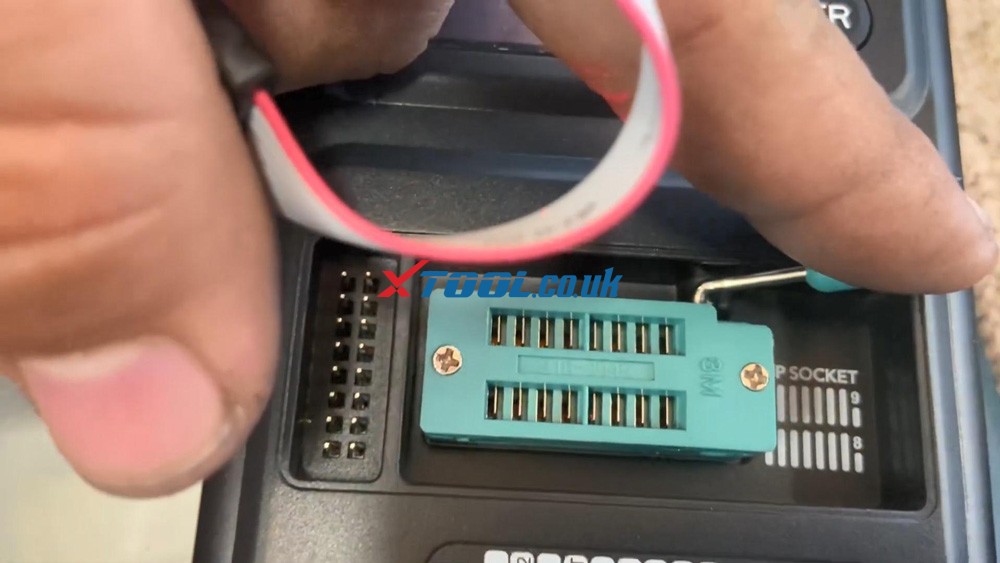
So as you can see right here a DIP socket, it tells us that the pin number one is down here.

Xtool X100 Pad3 Se Reflash Toyota Lexus Ic900 93c56 Data 03

In order to connect them to a dip socket.

You need to move the little lever up and that opens the teeth when you move it to the left.

So you guys see where that red cable is.

A little extra sign is gonna be to the left. In other words, the red cable you see right there into the plug, it’s gonna be pointing down and it’s gonna be in the first, there’s two sockets, connect it into the first socket and then close it.

As you’re holding it down, you’re moving the lever down, so it can be attached there.

Xtool X100 Pad3 Se Reflash Toyota Lexus Ic900 93c56 Data 04

Alright so you guys see the red wire right is gonna go to pin number one.

Xtool X100 Pad3 Se Reflash Toyota Lexus Ic900 93c56 Data 05

And On the IC900 chip in the ECU.

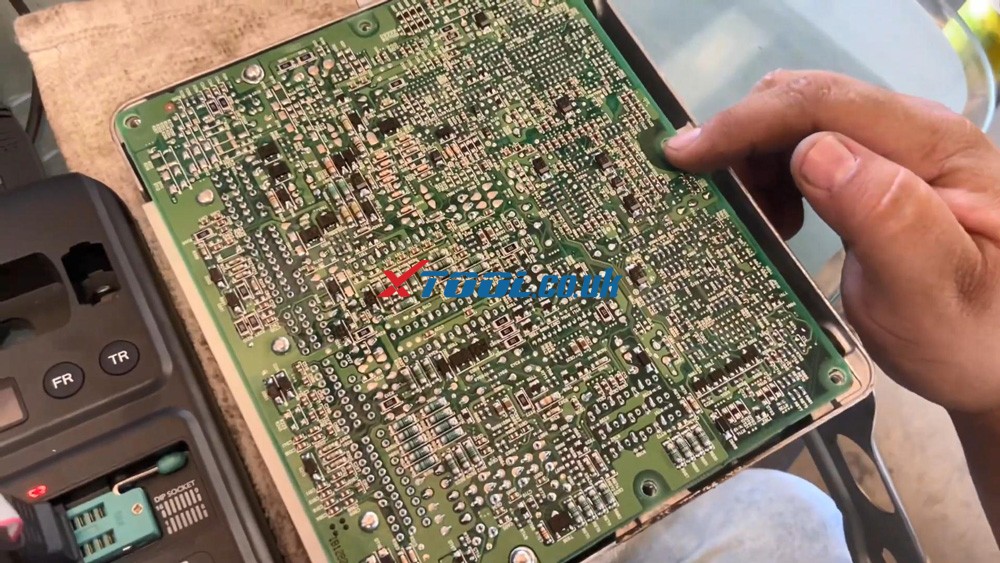
So in order to open up the ECU, and that’s four screws, turn it around, once screw at the 4 corners.

And this comes off, make sure that when you take this off, you don’t come in contact with any type of metal or anything like that.

You also need to take 2 screws off.

And then this comes out as soon as you take those two screws off to make sure that you don’t put it on any that you don’t do any problem on any metal surfaces or anything like that.

Make sure you have a nice little rag or something, you know that you can conduct electricity.

So maybe like some plastic, a rubber mat.

So you don’t want to place this over nothing metal, because they might make contact or so we want to just put like a metal under it.

Xtool X100 Pad3 Se Reflash Toyota Lexus Ic900 93c56 Data 06
Xtool X100 Pad3 Se Reflash Toyota Lexus Ic900 93c56 Data 07

We’re looking for the IC900 chip, let me show you guys where it’s at, it’s on the corner over here.

Now reading on the IC900 chip 93C56. Remember that number because we’re gonna need it later on.

Xtool X100 Pad3 Se Reflash Toyota Lexus Ic900 93c56 Data 08

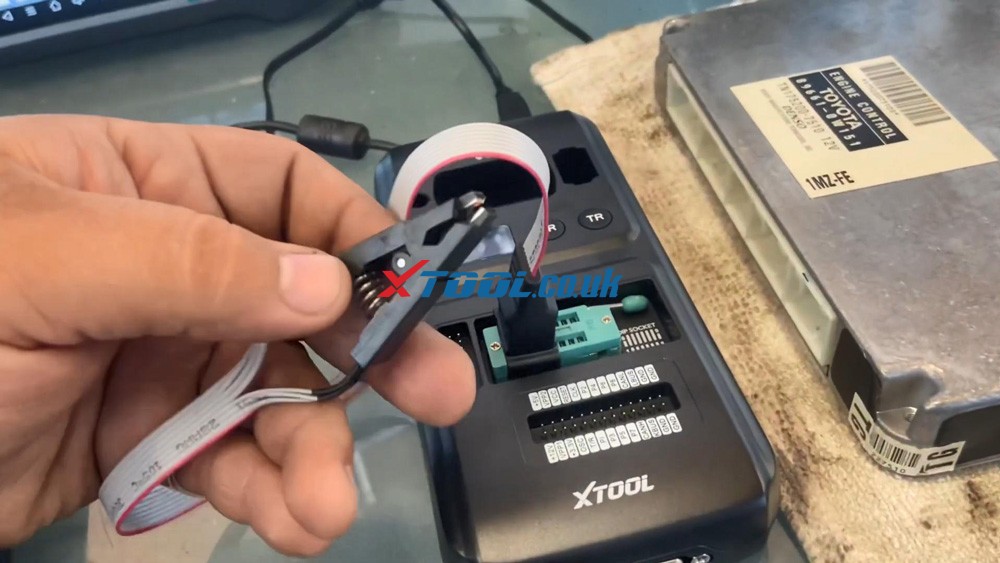
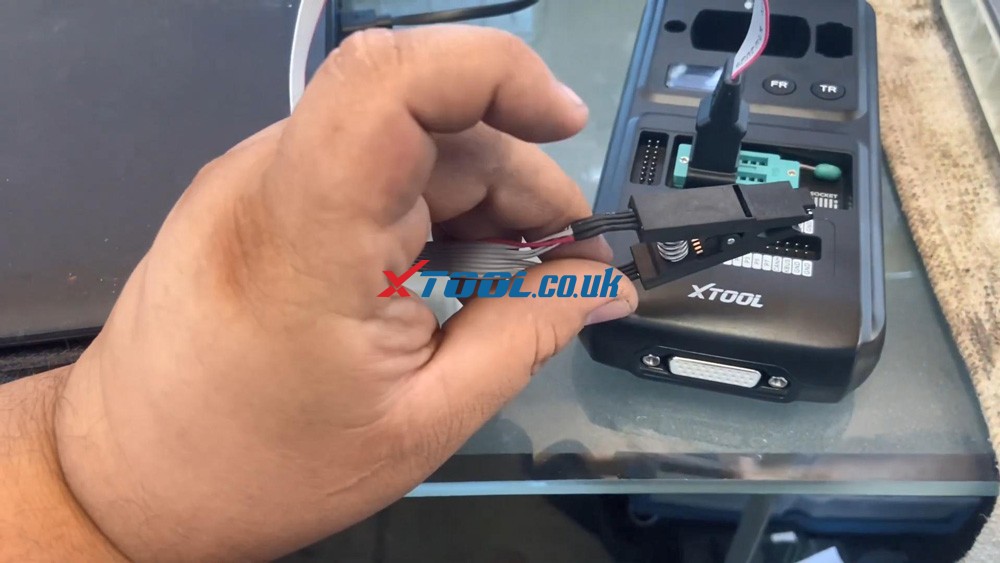
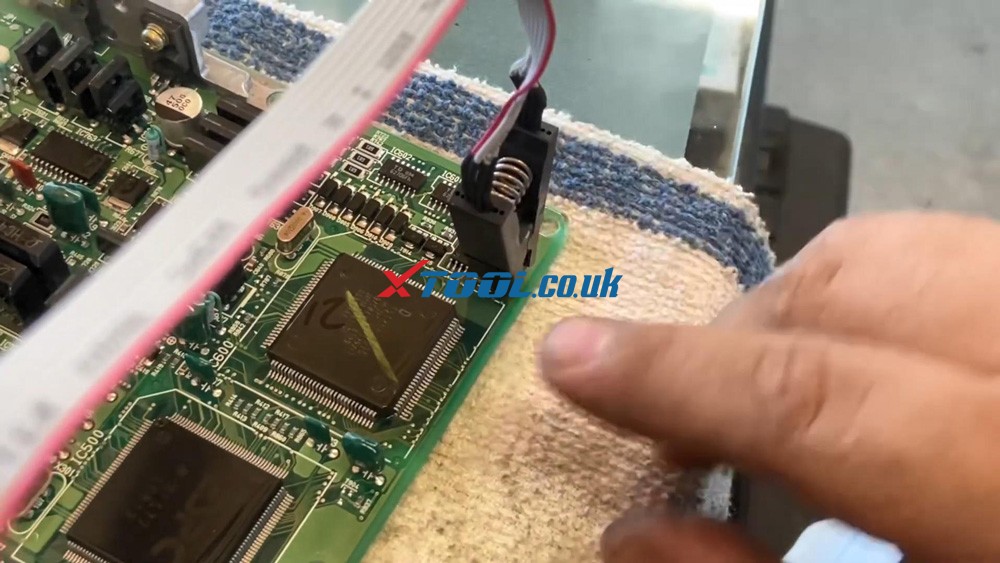
That’s why we’re going to plug in our cable, a clip and you can see it has a small dent on it, a small dental that means that little dot right there, you guys see that means that’s indicating that’s pin number one.

A little hole is pointing to pin number 1, that’s where are our connector’s gonna be at okay.

Xtool X100 Pad3 Se Reflash Toyota Lexus Ic900 93c56 Data 09

So that red wire would be like this.

Okay before you put this clip on, make sure you guys clean the leads right here, the pins.

So get like a little screwdriver or a little wire brush and clean around here, because that’s usually where you can read the data because you need to clean up these little leads.

Xtool X100 Pad3 Se Reflash Toyota Lexus Ic900 93c56 Data 10

Alright, let’s continue do this data initialized with X100 PAD3 SE.

We’re gonna connect our 8pin clip.

Well there’s a little red wire on the left-hand side, this is facing away from you, IC900 chip, make sure you clean the pins where it connects. So I can read the data.

If it doesn’t read the data because it’s not making good contact.

it’s going to number one on the dot, position number one pin.

Xtool X100 Pad3 Se Reflash Toyota Lexus Ic900 93c56 Data 11

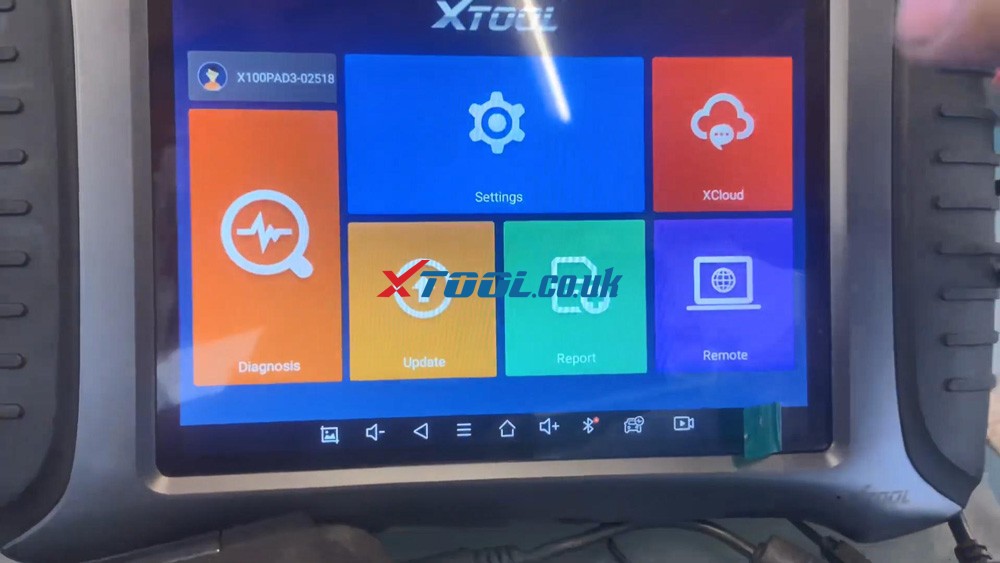
We are going to go to the main menu of X100 PAD3 SE, and go to “Diagnosis”.

Xtool X100 Pad3 Se Reflash Toyota Lexus Ic900 93c56 Data 12

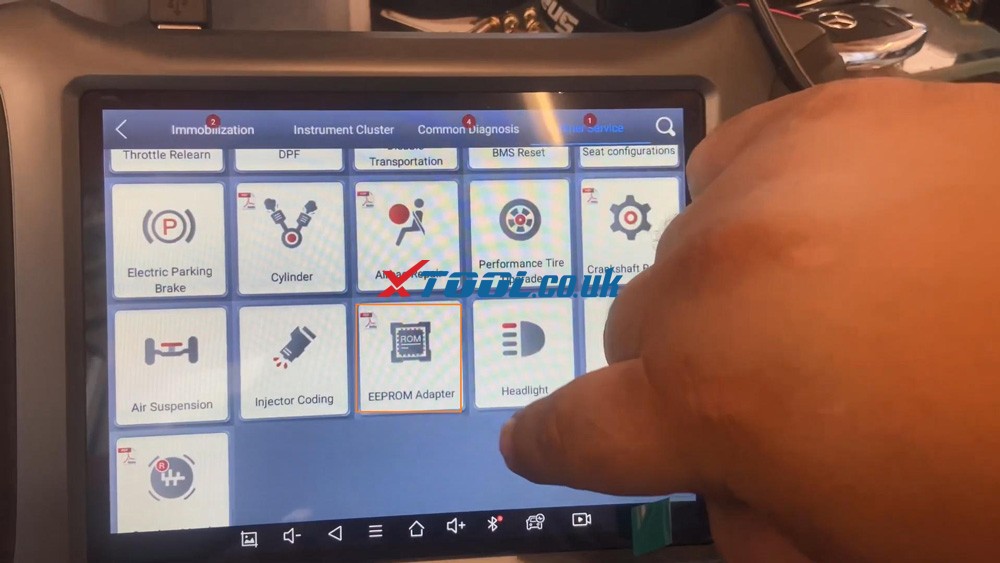
Go to “Other service” and go down “EEPROM adaptor”.

Xtool X100 Pad3 Se Reflash Toyota Lexus Ic900 93c56 Data 13

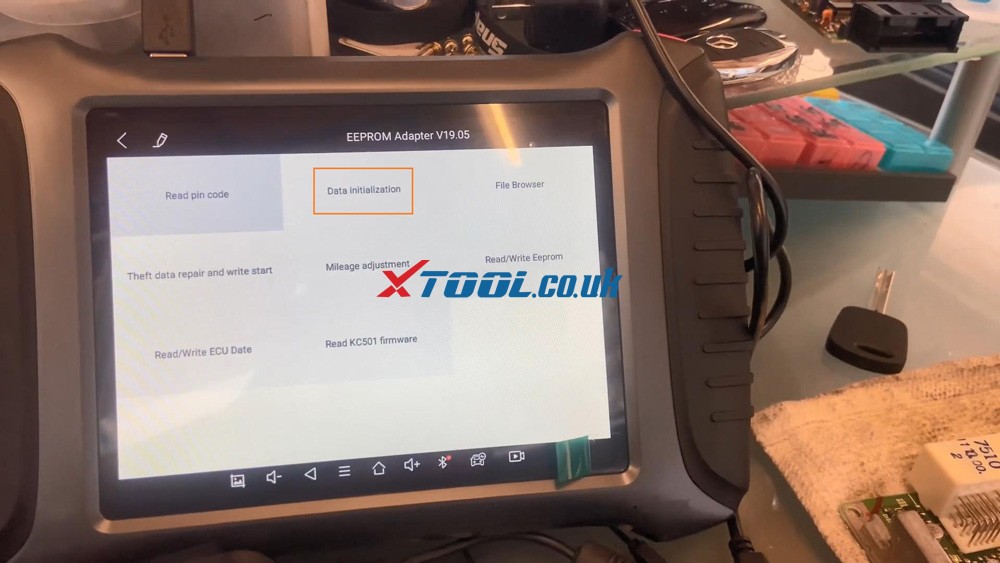
Go to “Data initialization”.

Xtool X100 Pad3 Se Reflash Toyota Lexus Ic900 93c56 Data 14

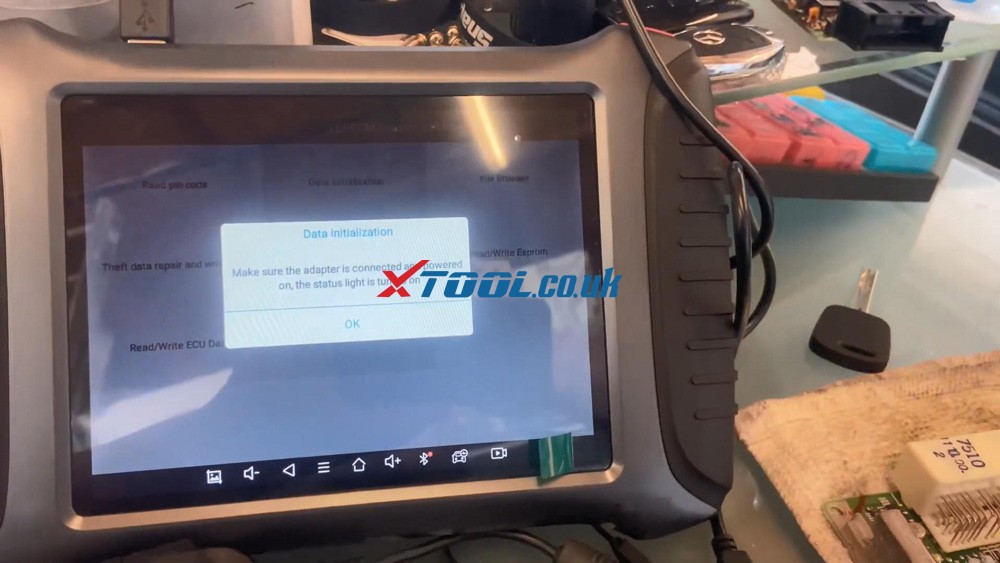
Make sure the adapter is connected and power on, the status light is turned on. Yeah, that’s connected powered on, we’re going to press “OK”.

Xtool X100 Pad3 Se Reflash Toyota Lexus Ic900 93c56 Data 15
Xtool X100 Pad3 Se Reflash Toyota Lexus Ic900 93c56 Data 16

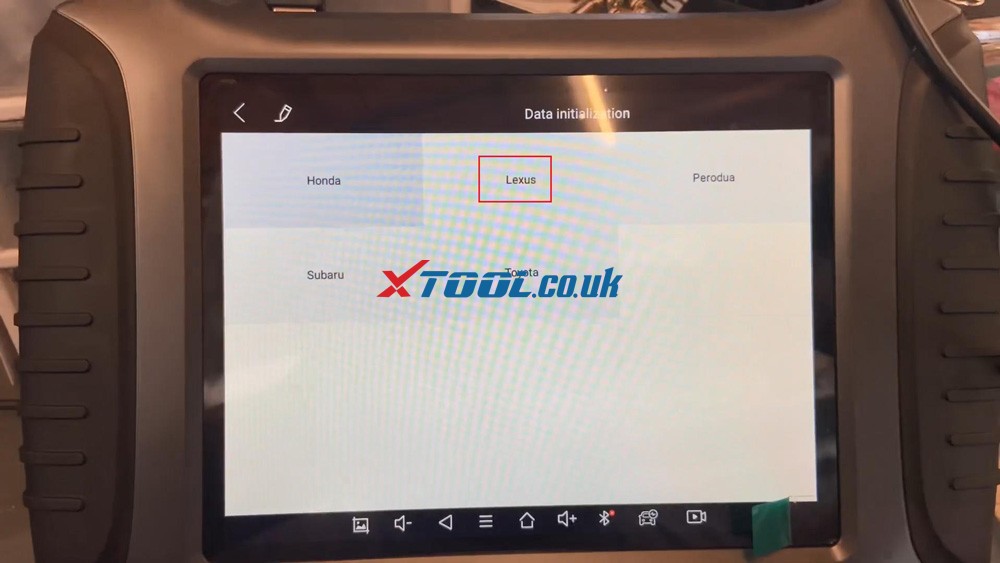
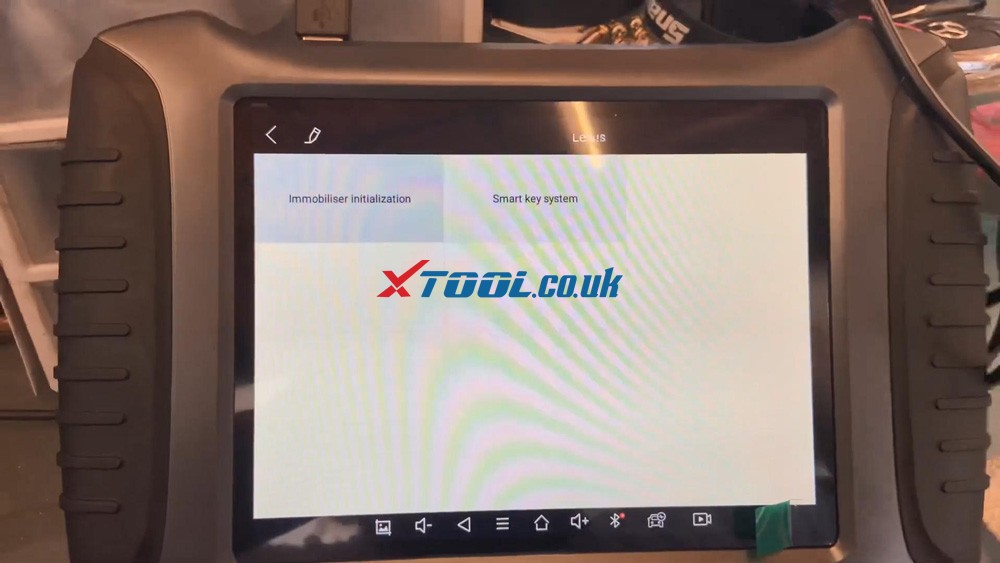
Go to “Lexus” and then “Immobilizer Initialization”.

Xtool X100 Pad3 Se Reflash Toyota Lexus Ic900 93c56 Data 17
Xtool X100 Pad3 Se Reflash Toyota Lexus Ic900 93c56 Data 18

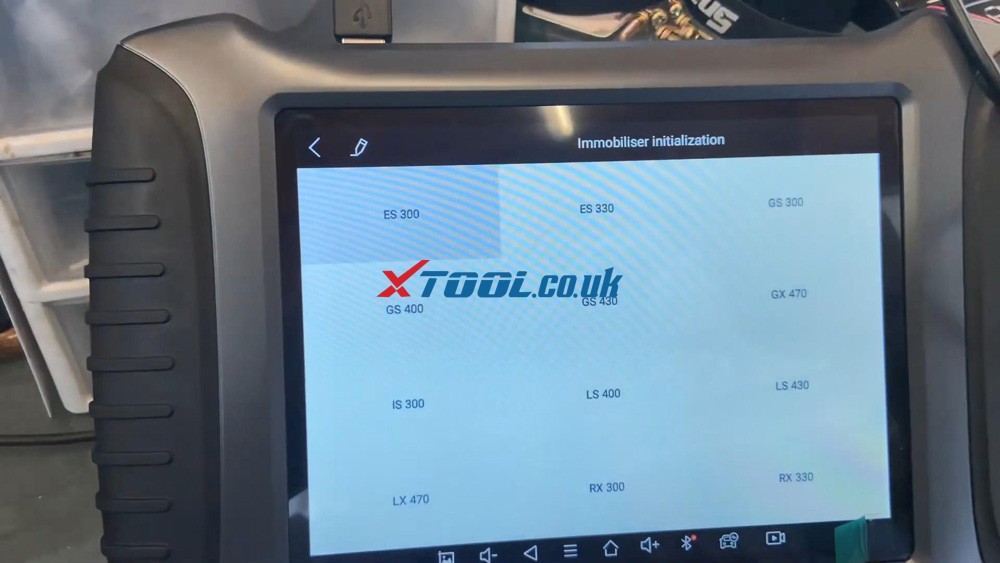
It’s IS300, make sure you select the correct model and year, this is 2001.

Xtool X100 Pad3 Se Reflash Toyota Lexus Ic900 93c56 Data 19

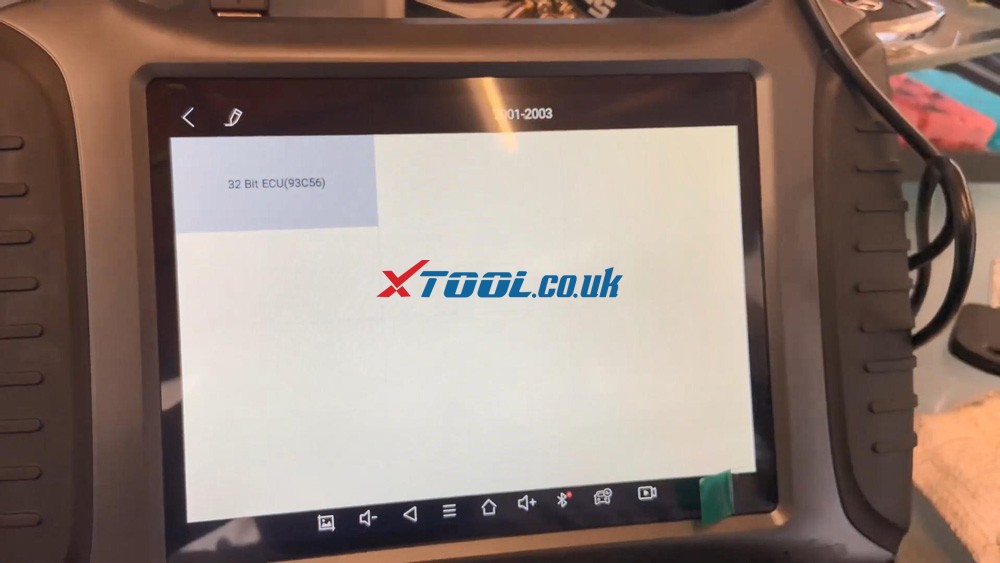
Go to 32 bit ECU (93c56), the chip number is the same one that’s on the chip.

Xtool X100 Pad3 Se Reflash Toyota Lexus Ic900 93c56 Data 20

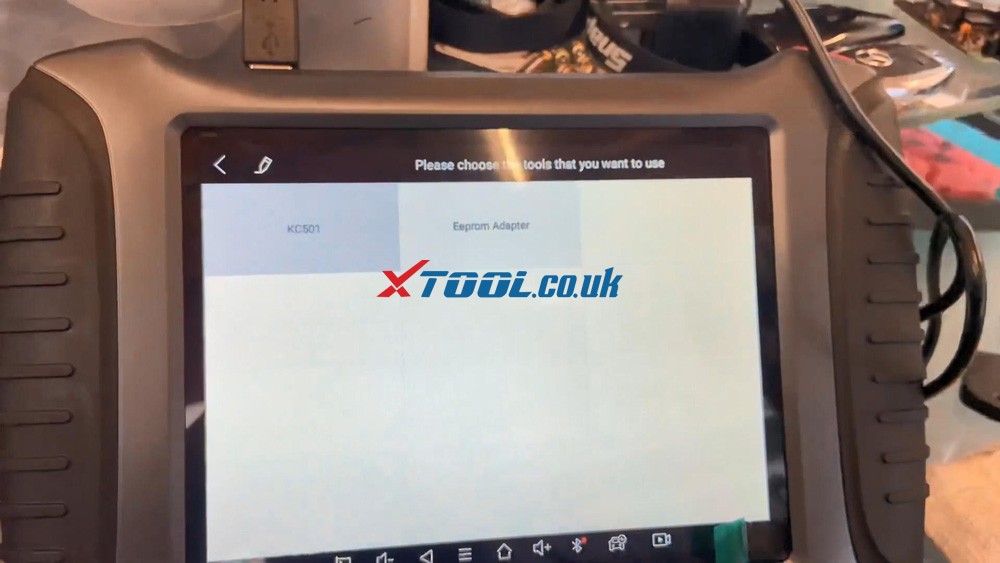
We’re gonna go to KC501.

Xtool X100 Pad3 Se Reflash Toyota Lexus Ic900 93c56 Data 21

128 by 16 we’re gonna press OK.

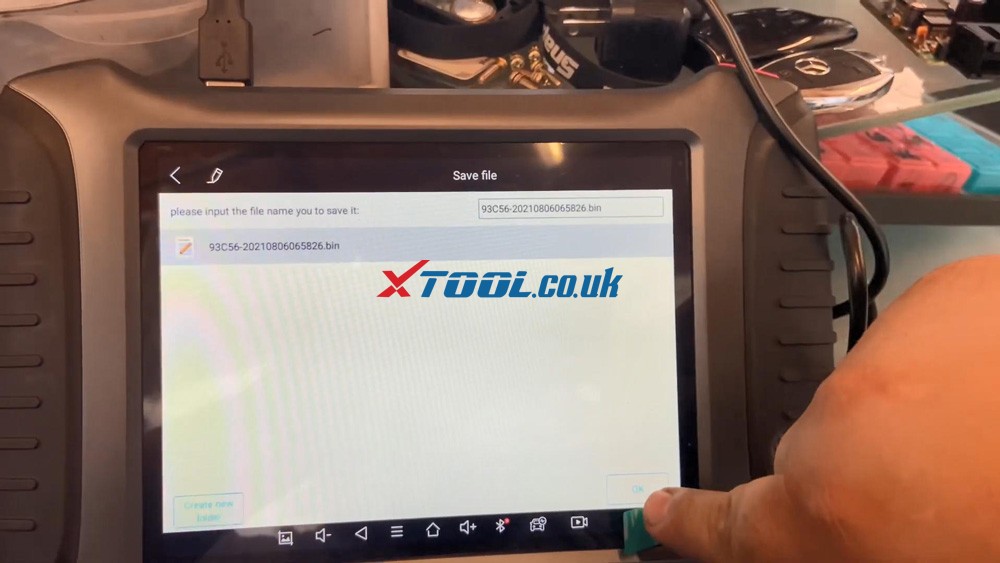
Go ahead and open up the file, save the file, please input the file name to save it, save it under the microchip and press OK.

Xtool X100 Pad3 Se Reflash Toyota Lexus Ic900 93c56 Data 22

The file already exists, do you want to overwrite it, press “Yes”.

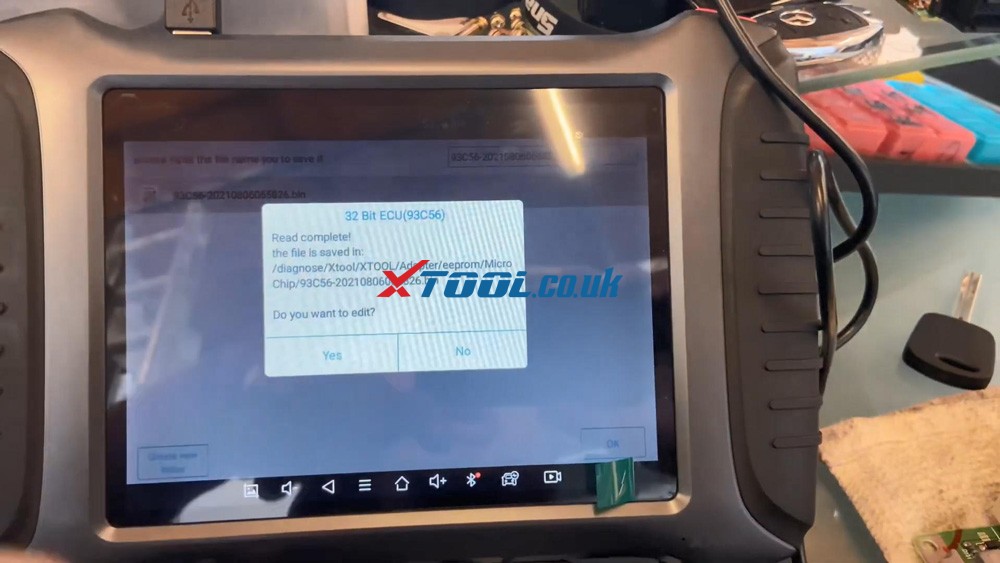
Okay, so read complete, do you want to edit, press “NO”, we do not want to edit, we just wanna reflash it, press “Yes” to continue.

Xtool X100 Pad3 Se Reflash Toyota Lexus Ic900 93c56 Data 23

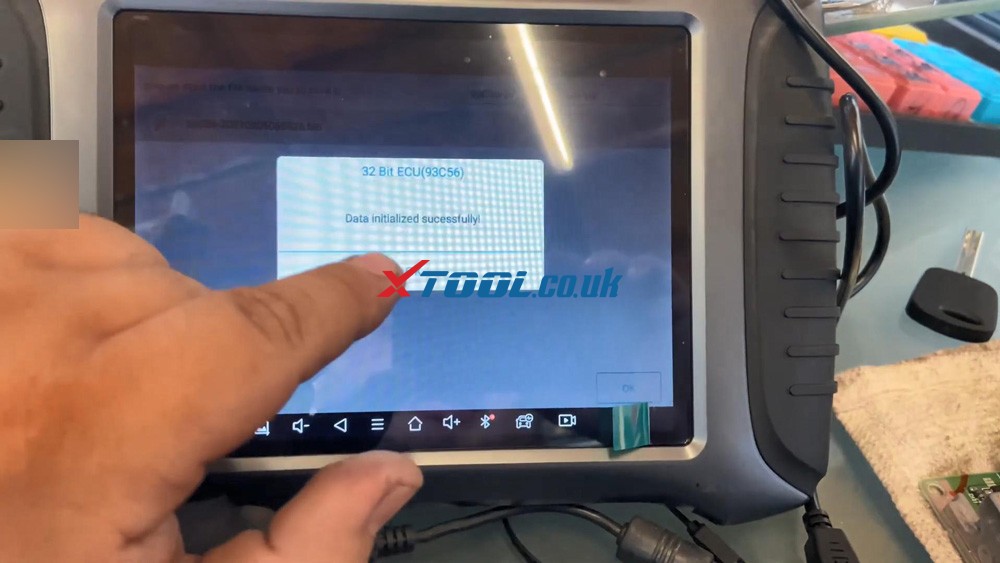
So we’re preparing the data, oaky data initialized successfully.

Xtool X100 Pad3 Se Reflash Toyota Lexus Ic900 93c56 Data 24

So now we’re gonna go ahead put everything back together and we’re gonna go ahead and match the keys to the vehicle. 

So let’s go connect back to the vehicle and, let’s get this thing done.

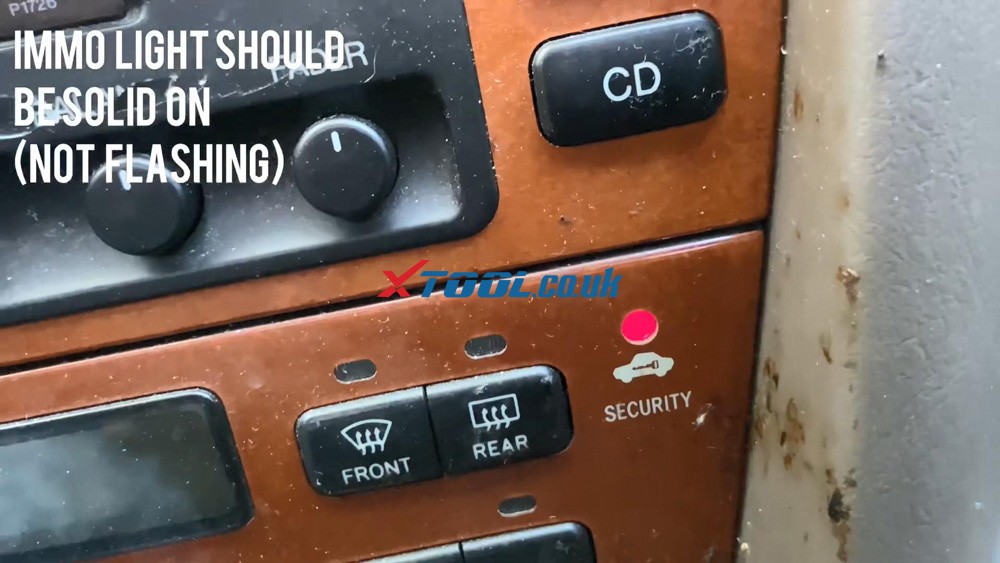
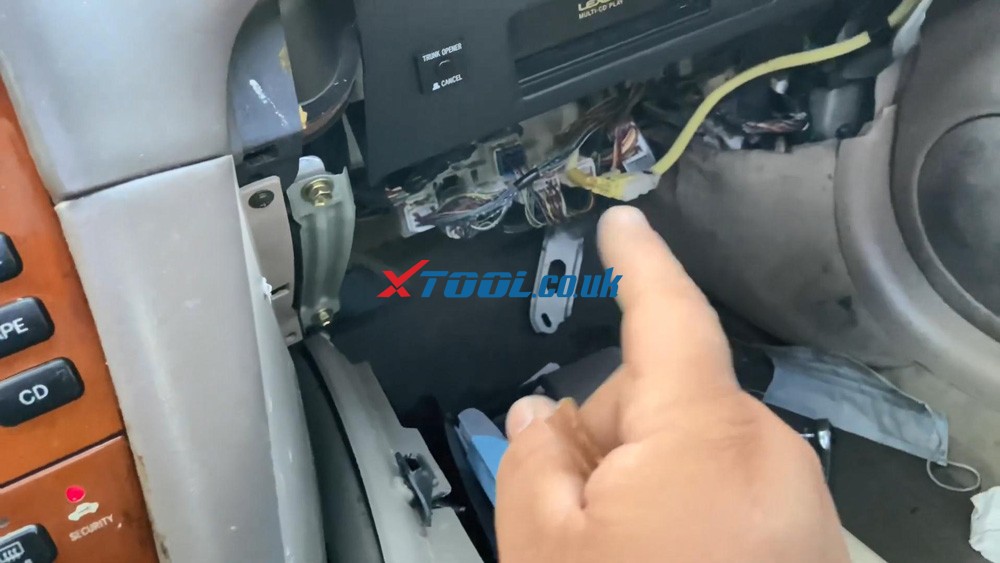
Alright, so we are on the vehicle right now because you can see the immobilizer light is not solid on, the ECU is plugged back in there, make sure you are plugging all cables, each cable goes to each individual slot, it doesn’t fit in the other one. Security light is on.

Xtool X100 Pad3 Se Reflash Toyota Lexus Ic900 93c56 Data 25
Xtool X100 Pad3 Se Reflash Toyota Lexus Ic900 93c56 Data 26

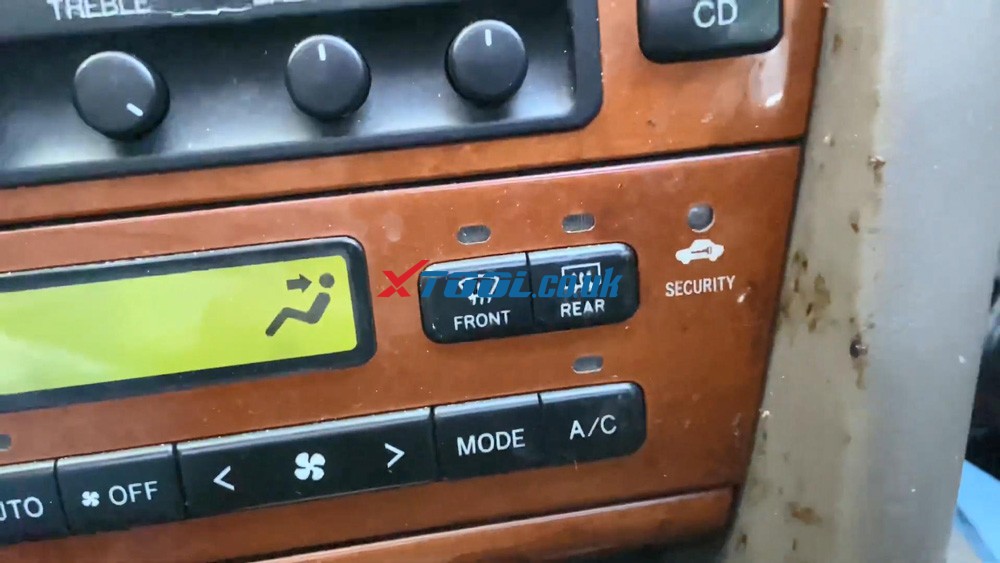
We have our 4C chip in here, you can program it to three keys, okay, so this is what we’re going to do when I stick it to ignition from off to on five times and leave it on the fifth time, 12345, leave it on and open the door, close it 123456, now this should be programmed, like I said, you can program to 3 keys, we’re gonna try it out, make sure that key goes off,  isn’t that amazing, immobilizer light is off, our vehicles on, our key is programmed . You can now manually program up to 3 keys, it’s really easy, you guys can see the light is flashing back to its normal state.

Xtool X100 Pad3 Se Reflash Toyota Lexus Ic900 93c56 Data 27

Anytime you stick in the key, and you turn it on, it lights up and then it turns off, so that means that we successfully program the key.

And that’s how I get the job done, Xtool X100 Pad3 SE, EEPROM, IC900, data initialization with KC501 programmer.\

http://blog.xtool.co.uk/xtool-x100-pad3-se-reflash-initialize-toyota-lexus-immobilizer-system/

Xtool X100 PAD2 + KEYDIY Add Jaguar Landrover 2014+ smart Key OK

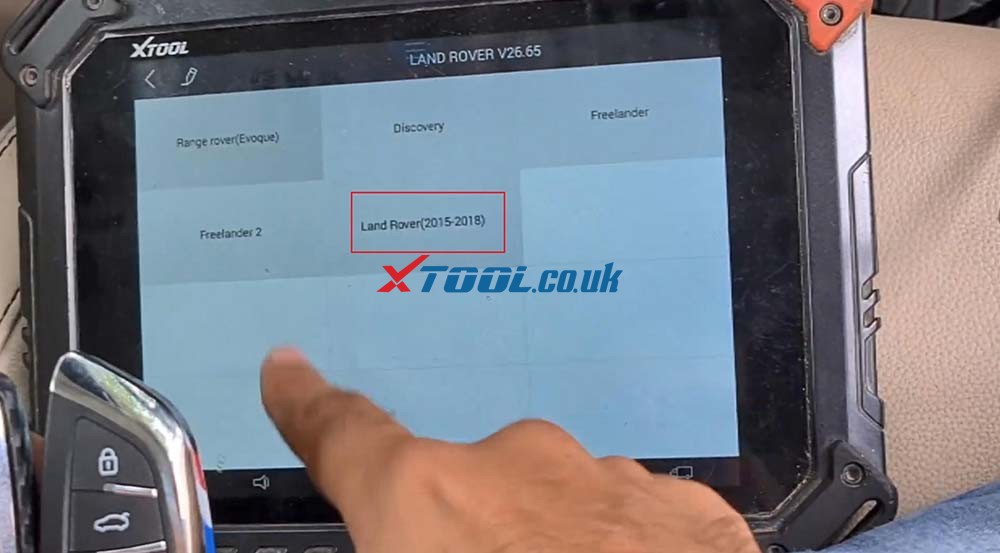
How to use Xtool X100 PAD2 add new key in 2015 -2018 Jaguar and Landrover Cars & SUV without opening KVM. This technique may even work in all key lost.

Good news!!! XTOOL X100 Pad tablet series adds all keys lost programming via OBD directly (free pin code) for 2015-2018 Jaguar/Land Rover Models with FK72 KVM module.

Step 1. Generate new smart key for Jaguar XE in KEYDIY.

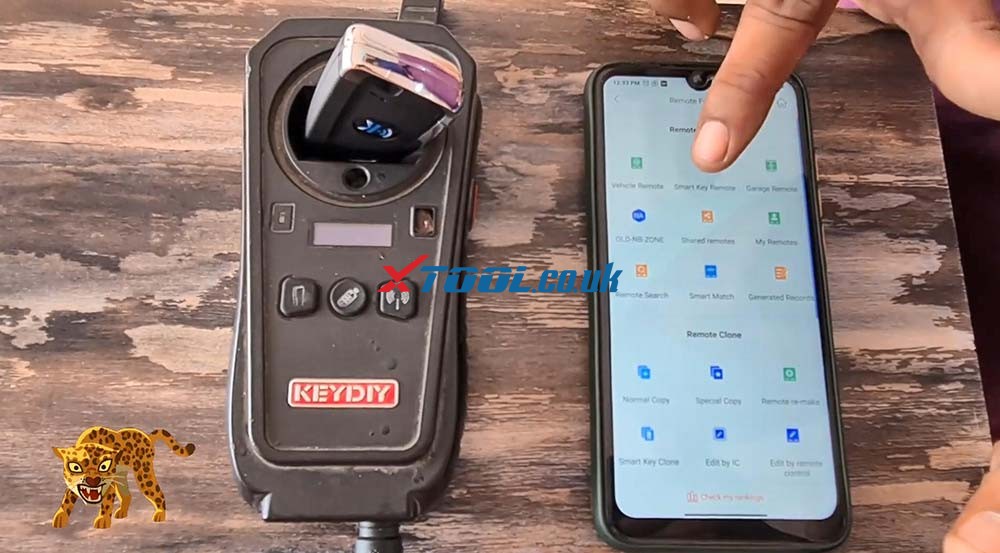
Tap “Smart Key Remote” in the KEYDIY APP that was installed in the phone.
Meanwhile, put the New Jaguar and Landrover key into the coil of KEYDIY.

programming-jaguar-langrover-2015-2018-all-keys-lost-by-x100-pad2-01

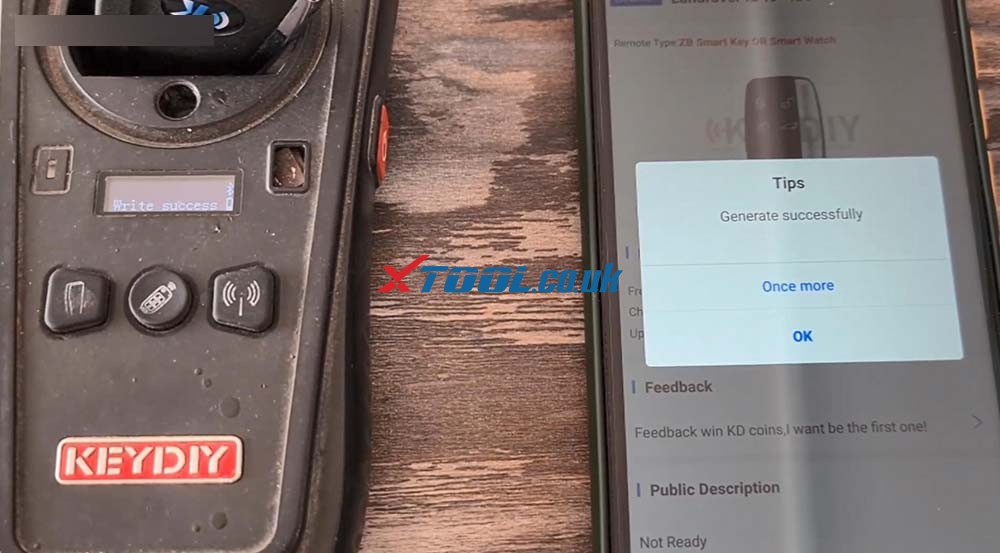
Scroll down and select “Land Rover”, and then “Landrover ID49 433“, then “Generate“.
Generate successfully.

programming-jaguar-langrover-2015-2018-all-keys-lost-by-x100-pad2-05

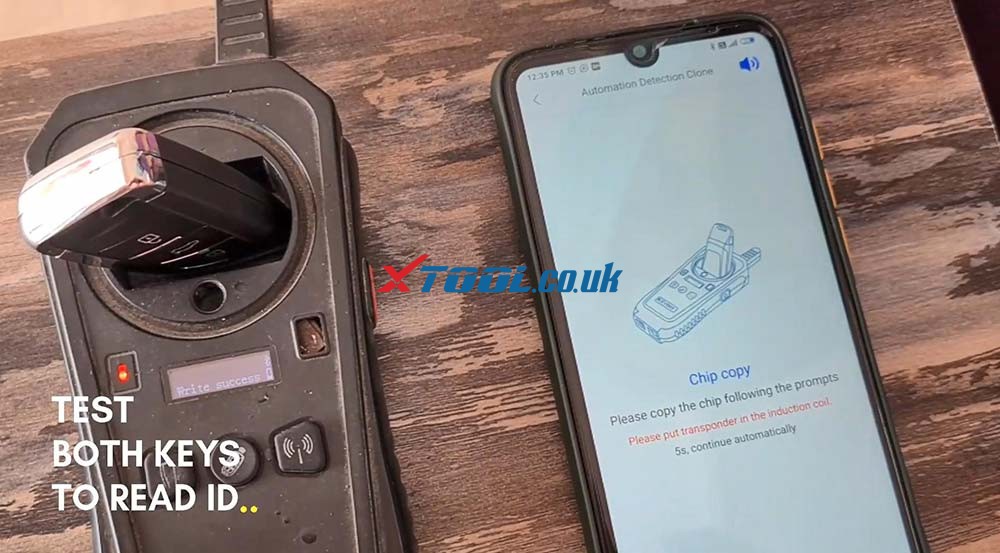
Click “OK” and then back to the home menu to select “Automation Detection Clone“.
Please copy the chip by following the prompts.

programming-jaguar-langrover-2015-2018-all-keys-lost-by-x100-pad2-06

Have new ID.

programming-jaguar-langrover-2015-2018-all-keys-lost-by-x100-pad2-07

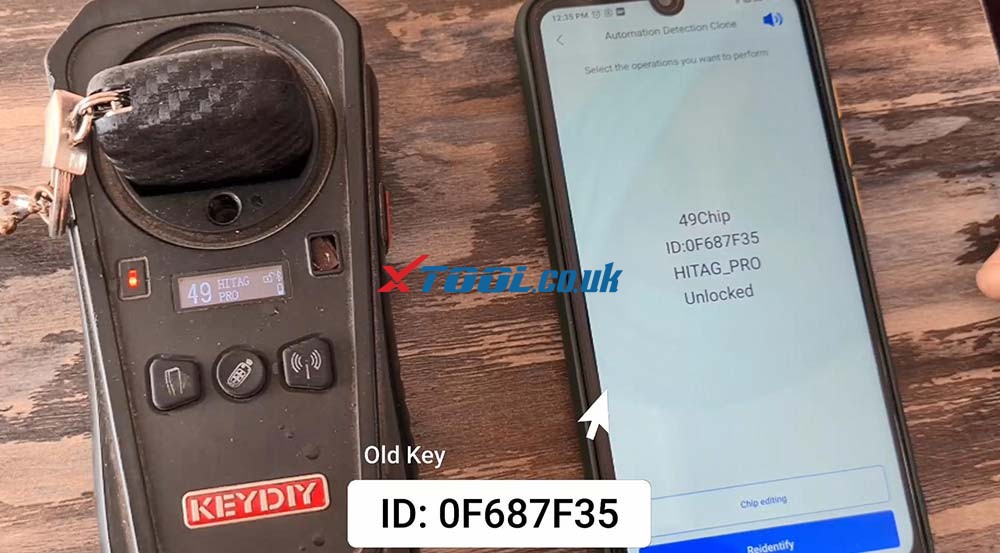
Take the new key out of the coil of KEYDIY, and put in the old key and have the old key ID.
Then take out the old key.

programming-jaguar-langrover-2015-2018-all-keys-lost-by-x100-pad2-08

Step 2. Program new key using Xtool X100 PAD2 in car.
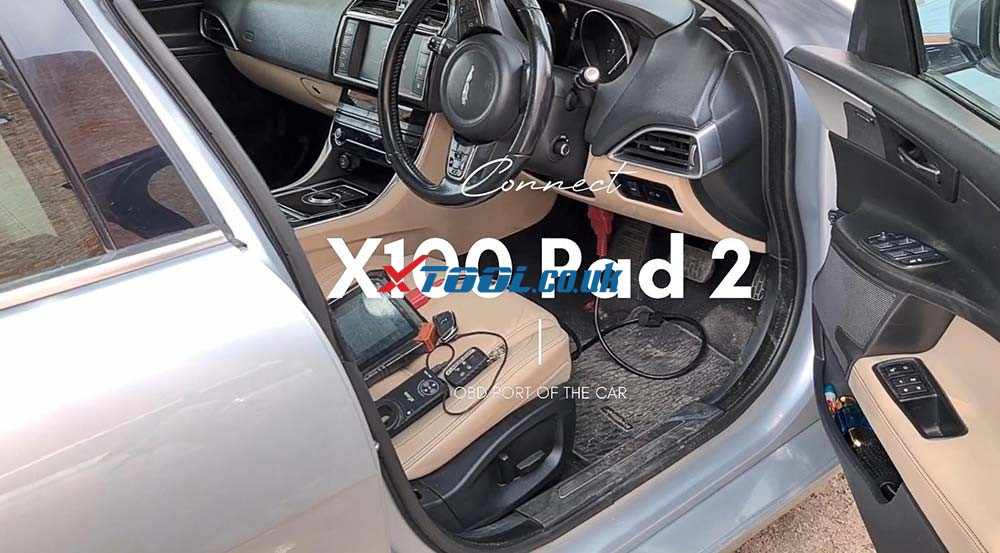
As you can see, the Xtool X100 PAD2 is connected into the OBD2 port of the car.

programming-jaguar-langrover-2015-2018-all-keys-lost-by-x100-pad2-09

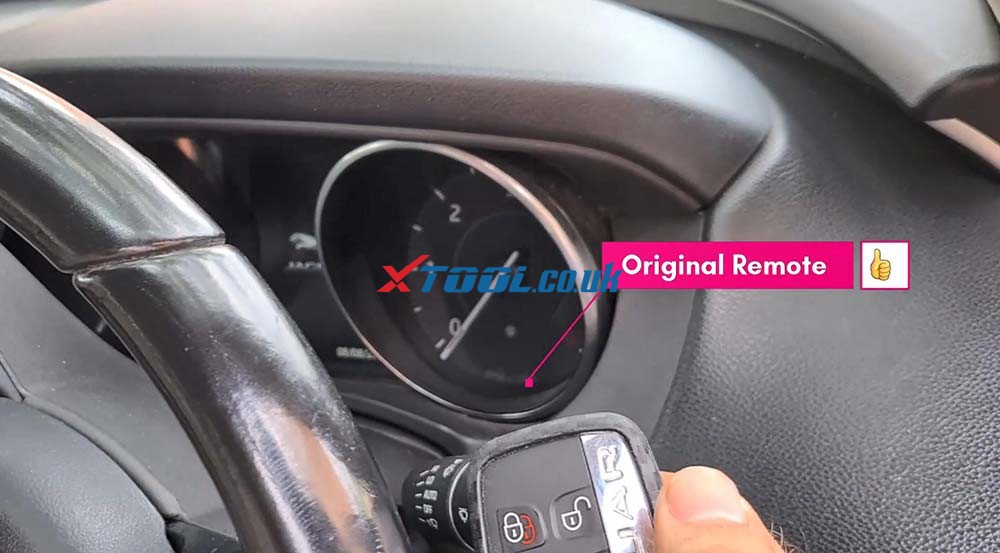
The original remote is working.
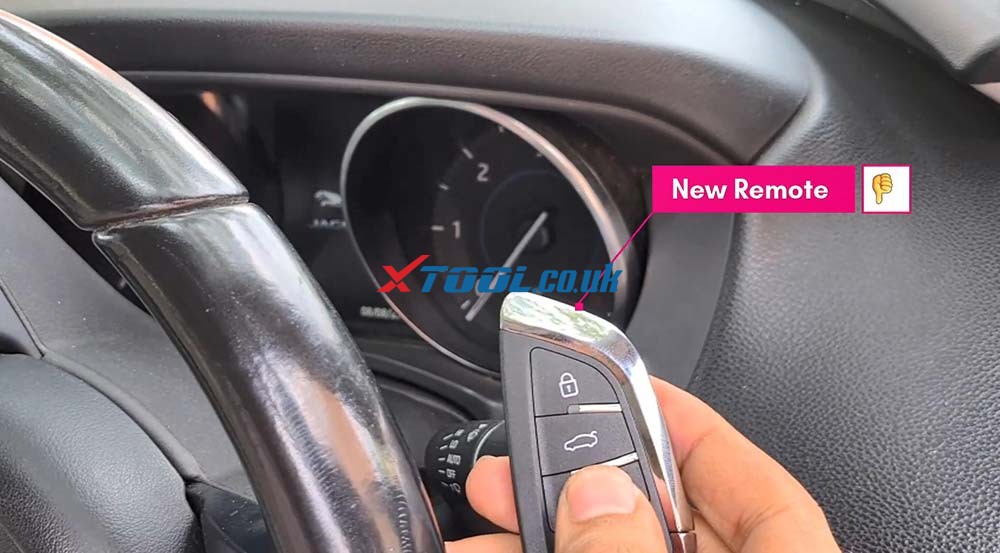
And the new remote is not working.

programming-jaguar-langrover-2015-2018-all-keys-lost-by-x100-pad2-10
programming-jaguar-langrover-2015-2018-all-keys-lost-by-x100-pad2-12

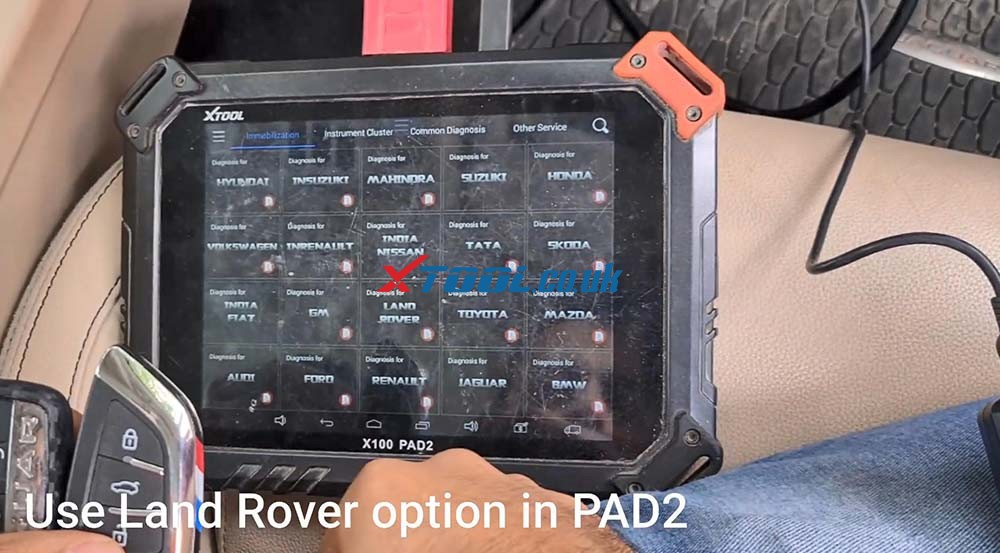
Tap “Land Rover” in the “Immobilizer” menu of Xtool X100 PAD2.

programming-jaguar-langrover-2015-2018-all-keys-lost-by-x100-pad2-13

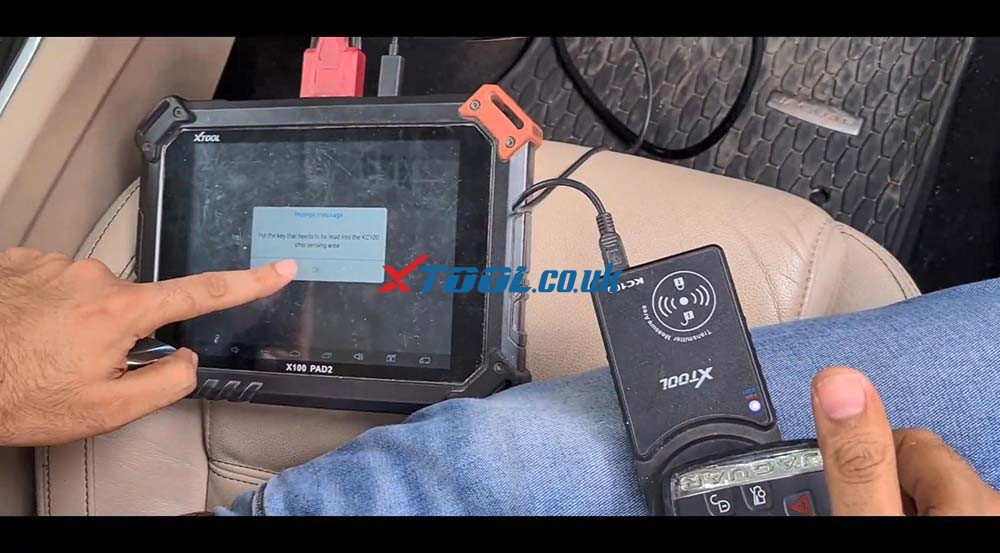
Tap “Land Rover (2015 – 2018)” , then “Write to start“, then “Read Key ID” and it pops up “Put the key that needs to be read into the KC100 chip sensing area” and then the key ID is read out successfully.

programming-jaguar-langrover-2015-2018-all-keys-lost-by-x100-pad2-14

programming-jaguar-langrover-2015-2018-all-keys-lost-by-x100-pad2-15
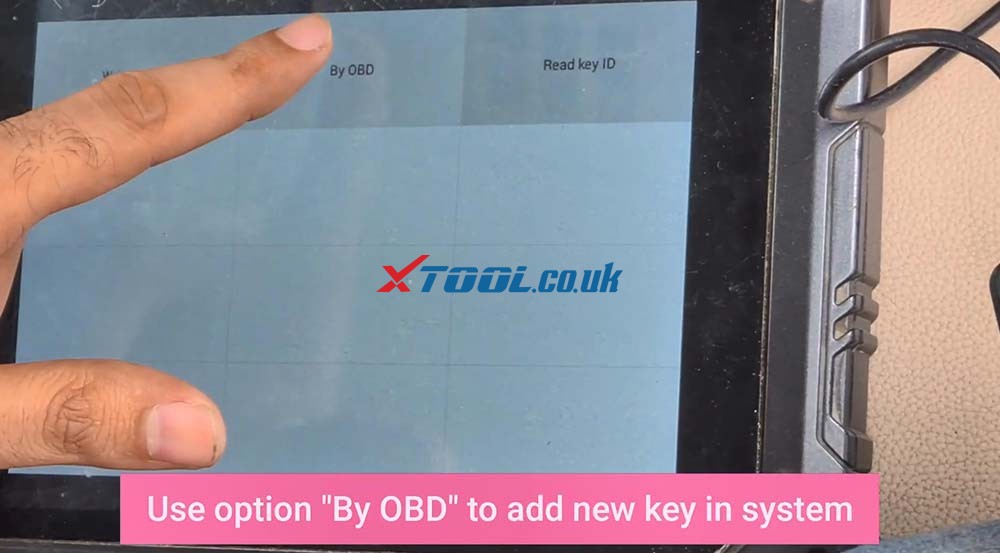
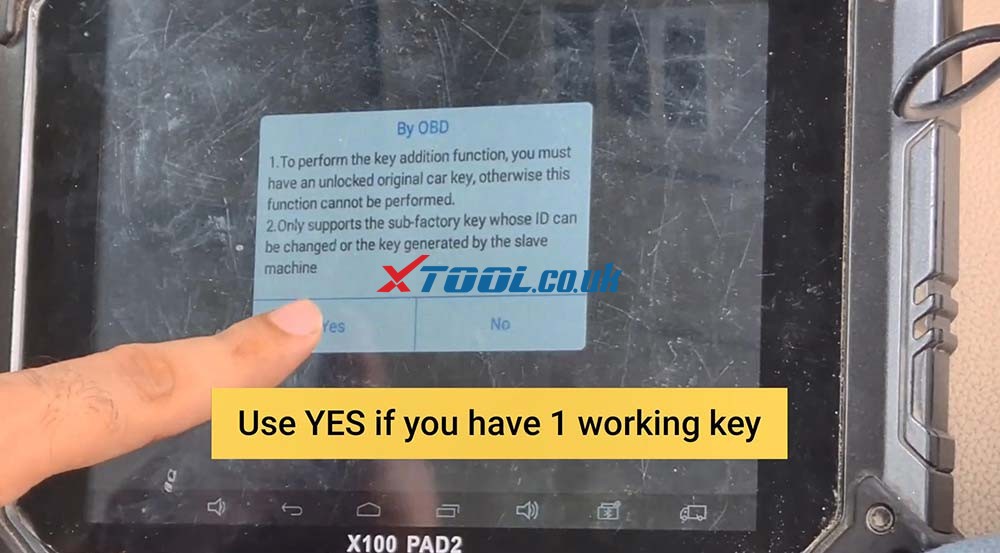
Tap “By OBD” to add new key in system.

programming-jaguar-langrover-2015-2018-all-keys-lost-by-x100-pad2-16

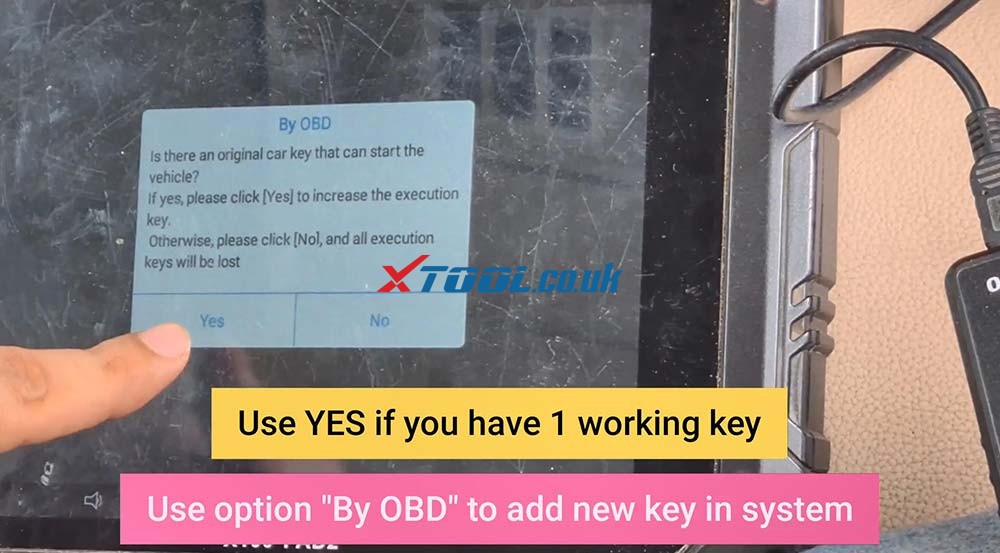
Tap “Yes” if you have one working key.

programming-jaguar-langrover-2015-2018-all-keys-lost-by-x100-pad2-17
programming-jaguar-langrover-2015-2018-all-keys-lost-by-x100-pad2-18

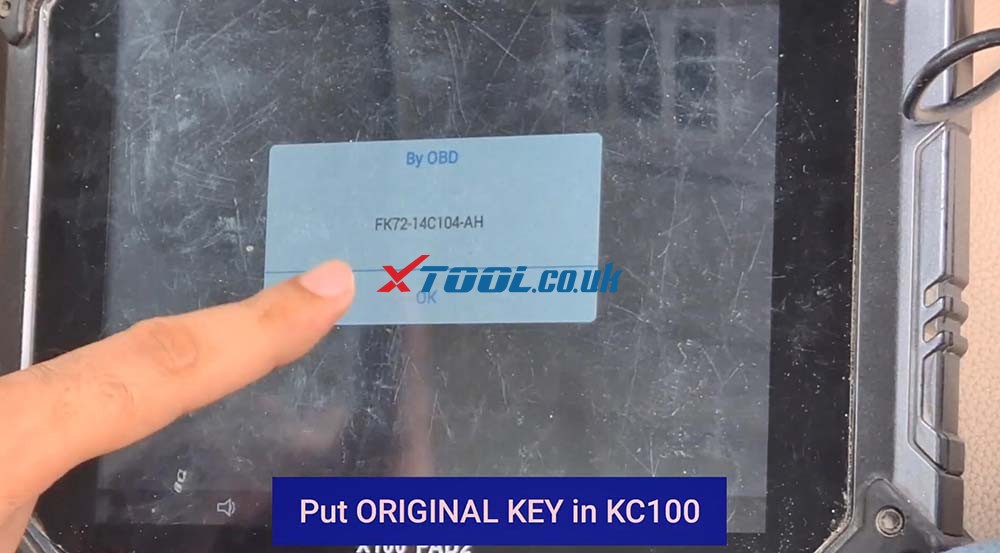
Put the original key into the coil of KC100, then tap “Yes” to continue.

programming-jaguar-langrover-2015-2018-all-keys-lost-by-x100-pad2-19

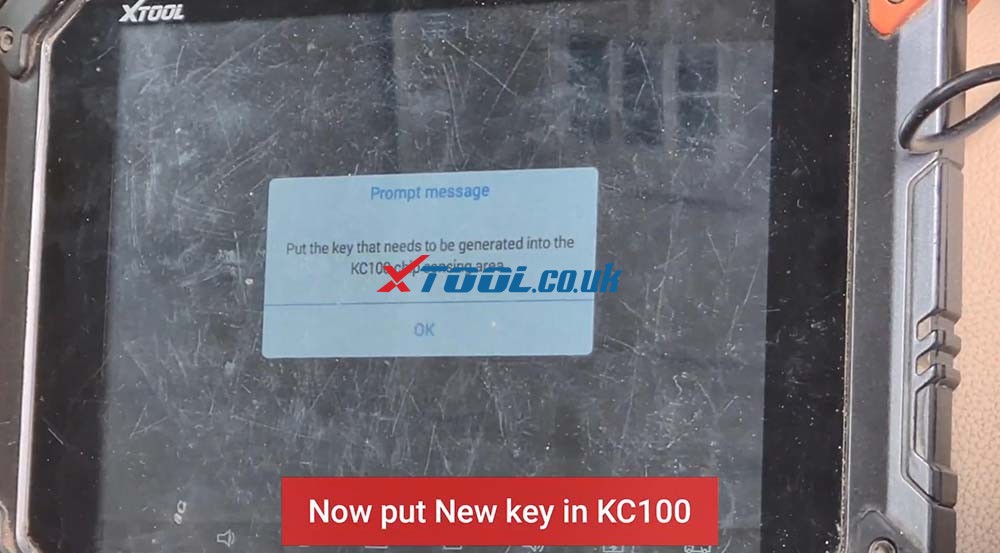
Now, put the new key that needs to be generated into the KC100 chip sensing area.

programming-jaguar-langrover-2015-2018-all-keys-lost-by-x100-pad2-20

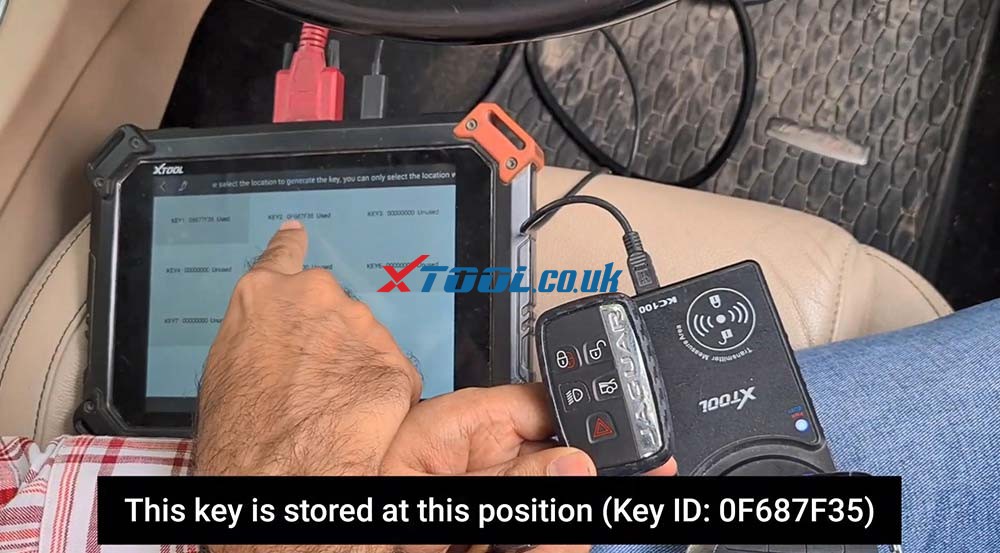
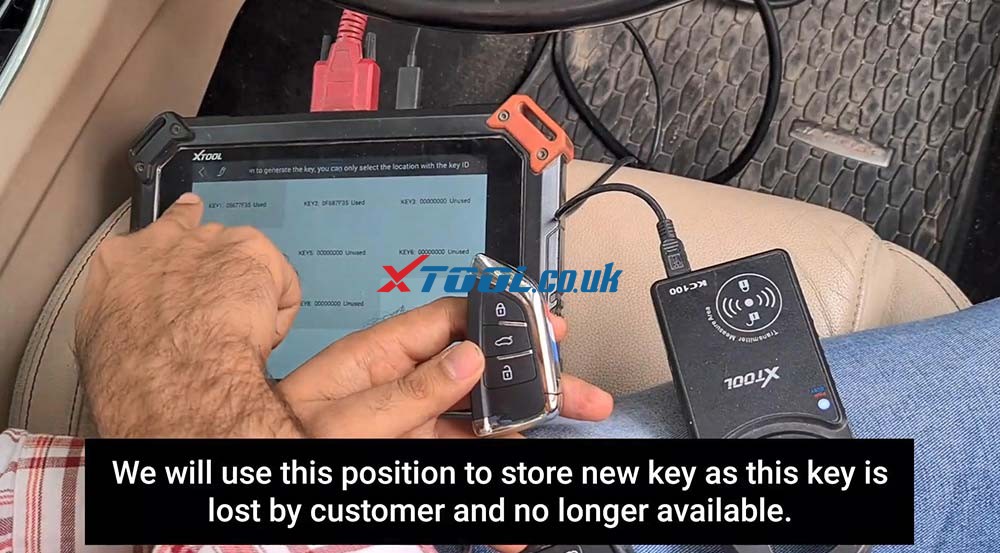
This key is stored at this position (Key ID: 0F687F35).

programming-jaguar-langrover-2015-2018-all-keys-lost-by-x100-pad2-21

We will use this position to store new key as this key is lost by customer and no longer available.

programming-jaguar-langrover-2015-2018-all-keys-lost-by-x100-pad2-22

Select “No” if we don’t want to add any other key.
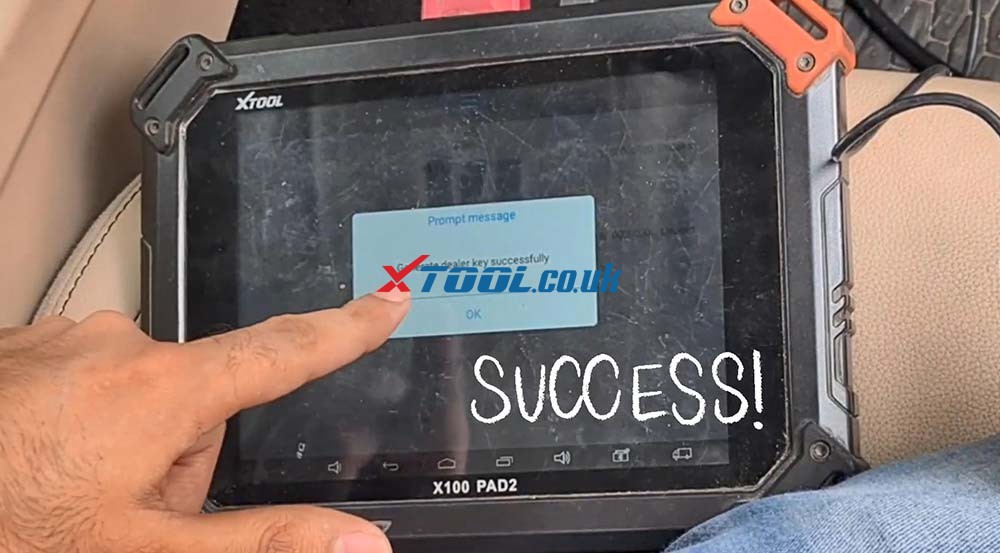
Generate dealer key successfully! Perfectly.

programming-jaguar-langrover-2015-2018-all-keys-lost-by-x100-pad2-23

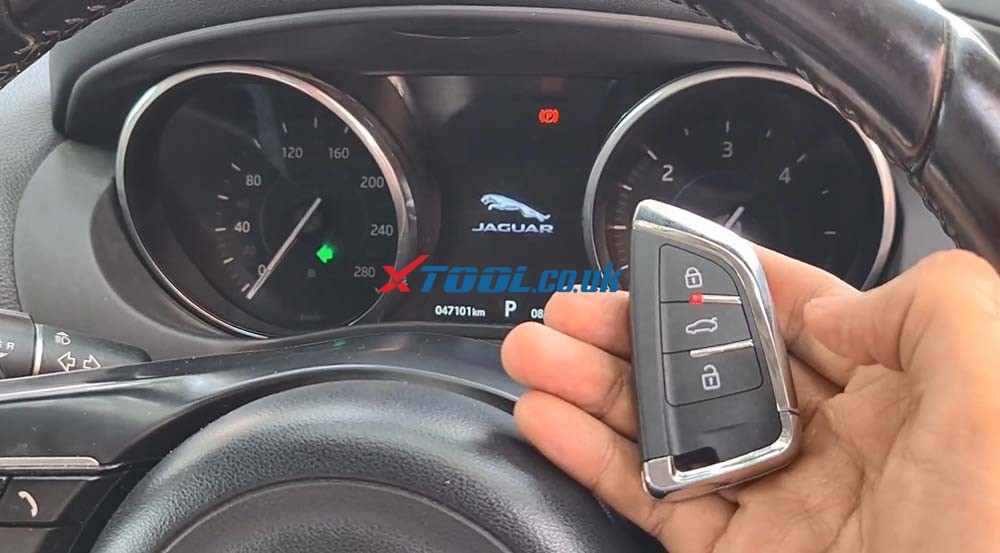
Next, let’s test if the new key can start the car. It’s amazing, the new key is working.

programming-jaguar-langrover-2015-2018-all-keys-lost-by-x100-pad2-24

Alright, if you find this article is helpful and interested in Xtool PAD2, please ensure it comes with KC100.

http://blog.xtool.co.uk/programming-jaguar-and-landrover-2014-smart-key-using-x100-pad2/

How to do Online ECU Programming for BMW by Xtool A80 Pro?

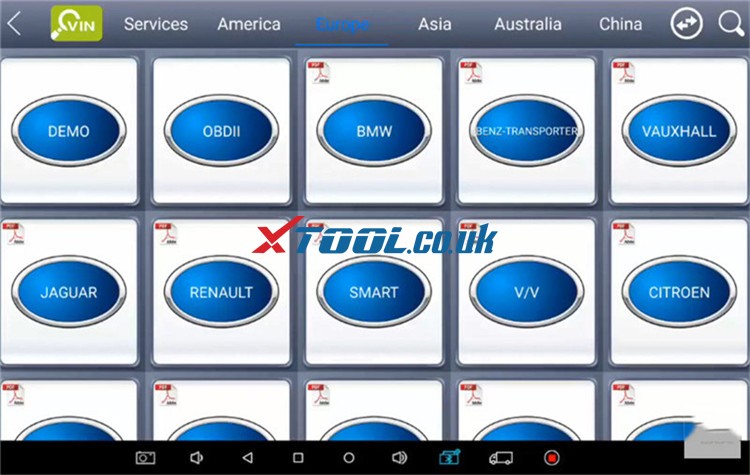
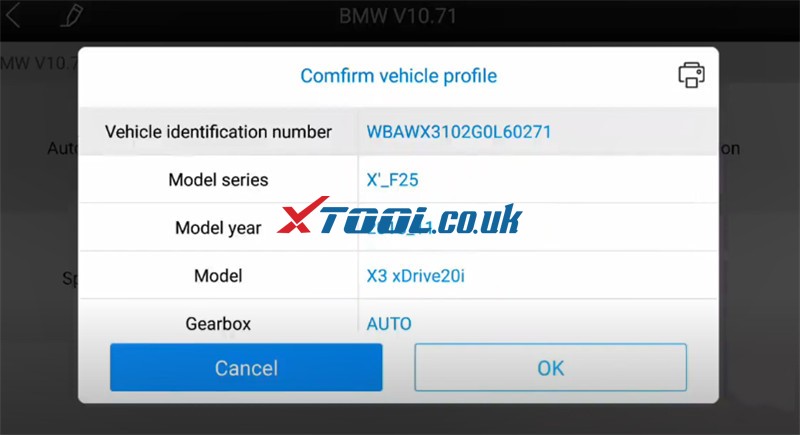
It is a 2015 BMW X3 F25 X3 xDrive20i (Europe). The seat memory, driver programming and coding were completed by Xtool A80 Pro (H6 Pro).Note: the device used is Xtool H6 Pro, but A80 Pro covers the same function. Operation guide:Turn on Xtool tabletSelect Xool Diagnosis>> Diagnosis>> Europe>> BMW>> Automatic selection

Xtool A80 Pro Bmw Online Ecu Program 1
Xtool A80 Pro Bmw Online Ecu Program 2

 Confirm the vehicle profile

Xtool A80 Pro Bmw Online Ecu Program 3

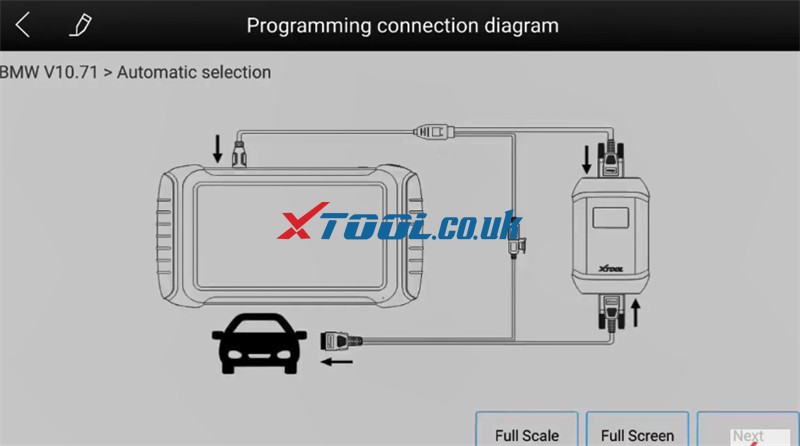
Select Programming/Coding, the corresponding programming connection diagram will appear on the screen

Xtool A80 Pro Bmw Online Ecu Program 4
  • Connect VCI box to the vehicle via OBDII+ USB cable, and connect to A80 Pro via BMW cable

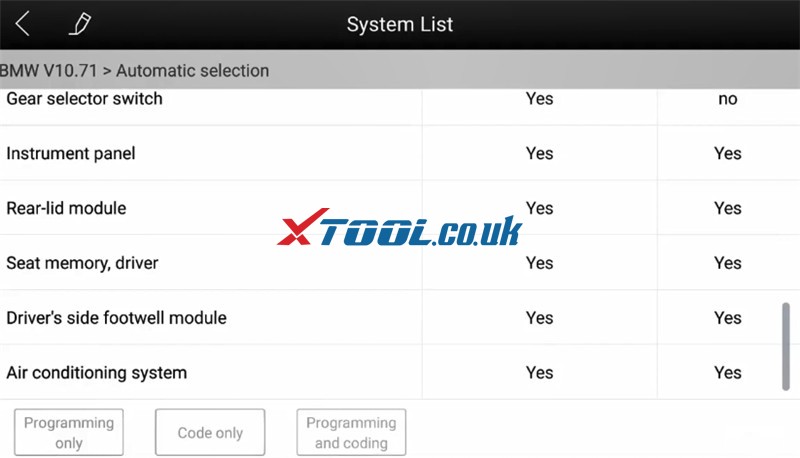
Read the disclaimer carefully and go to next stepIt will show the vehicle details.All systems are calculating configuration file of programming and coding. It will take about 3 minutes, just keep patient.Then follow the prompt to select the system to be programmed in the list

Xtool A80 Pro Bmw Online Ecu Program 5

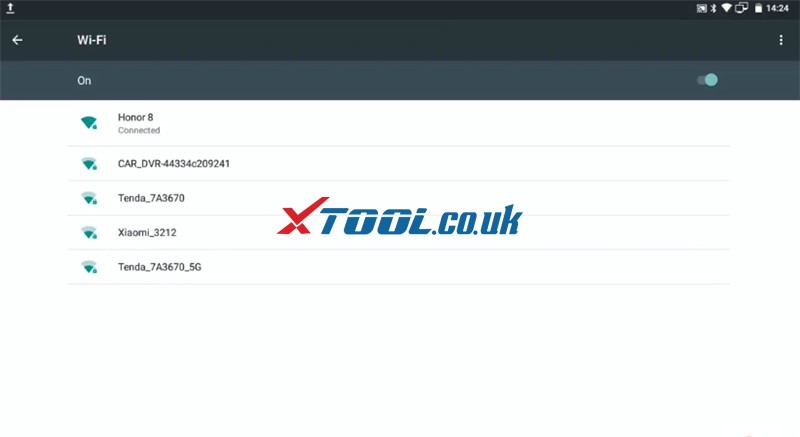
Note: Before programming/coding for the dashboard, make sure that the device is not modified, otherwise the operation may fail, and users shall bear the consequences it may result in.Important! Make sure A80 Pro has connected with an available WIFI before operation.Path: Go to settings>> Wi-Fi>> Select one available WiFi to connect

Xtool A80 Pro Bmw Online Ecu Program 6

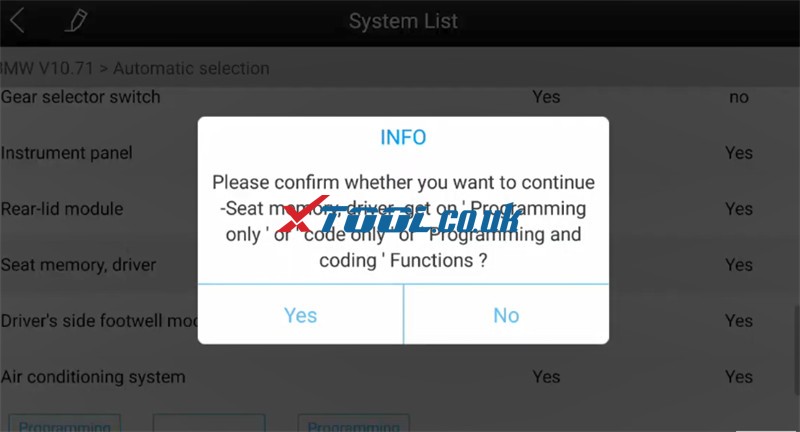
Then it will switch WLAN communication and download programming data from the serverConfirm whether you want to continue- Seat memory, driver- get on ‘Programming only’ or ‘code only’ or ‘Programming and coding’ functions

Xtool A80 Pro Bmw Online Ecu Program 7

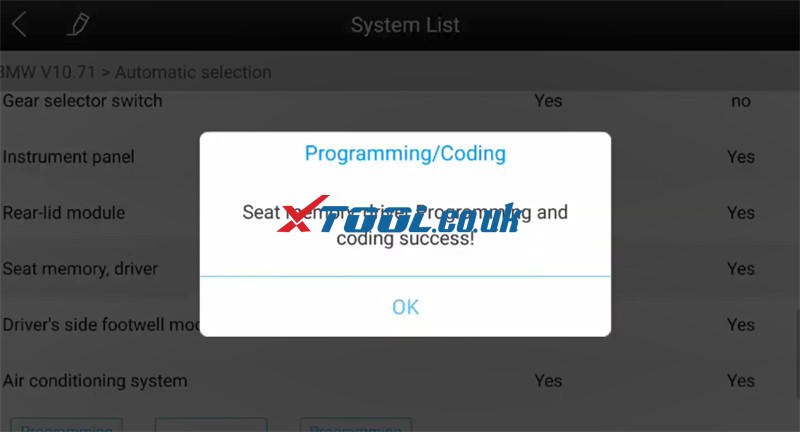
Make sure the ignition switch is onEnsure that the current-voltage must be 13V aboveBy diagnosis, eliminate no faults in the vehicle electrical systemConfirm the current system programmed times and go to perform seat memory and driver system programmingIt will take approximately 5 minutes to finish the whole programming operation.Seat memory, driver programming and coding are successful.

Xtool A80 Pro Bmw Online Ecu Program 8

Awesome! BMW 2015 X3 F25 Driver Seat memory online programming and coding are done successfully by XTOOL A80 Pro full system diagnostic tool.